Beauty Haul – 3 high-street finds for hair and skin


L'Oreal EverRiche Exilir for Hair1. EverRiche Perfect Elixir Mask Spray

Boots and other leading chemists.

Last weekend, I went shopping to replace a few skincare and haircare items that I’d run out of.

My hair, has become dry and lost some of its shine. Perhaps it’s my season of life, perhaps it is also the change in the light, the change in weather as Autumn slips slowly into Winter.

We’ve also had a whole week of dreary rain and my hair looks and feels tired and brittle, no doubt from blow drying and styling it with a hot hair dryer.

I’ve been using the shampoo and conditioner by L’Oreal, which is sulphate free, in my search for hair care products that don’t strip hair and scalp of natural oils.

If you have dry itchy scalp as I once had, switch to a shampoo and conditioner without Sulphates.  It is the best thing you can do for your hair and scalp.

After getting the shampoo and conditioner, the 3 for 2 offer in Boots was just too hard to resist. This meant the EverRiche Perfect Elixir Mask Spray for dry hair was added to my basket. I must admit it is a pleasure to use both in terms of the way it smells (It reminds me of almonds and vanilla) and the softness of my hair.

It also keep the hair smelling fresh.  In terms of shine though it is only a little improved.

2.Jojoba OilHolland & Barrett Jojoba Oil

Holland & Barrett

Looking around the high street, in both high-end department stores and pharmacies, I am overwhelmed by the amount of products on display. There are so many, each boasting of their abilities to add moisture, tighten skin, reduce wrinkles or cellulite and more, the claims seem so enticing.

To get everything, would involve a major dent in my budget, not to mention the trouble fitting everything into my bathroom.

One thing struck me though was a lot of the products on display were oils – for face, body and hair.

In Holland & Barrett, I came across pure Jojoba Oil, not listed as an ingredient in a product, but simply the pure oil. It was a bit more than I wanted to spend.

However, as it is a multipurpose oil that is so close to the natural oil produced by our own skin – Sebum, I decided that this would be a good investment as an oil that would be multi-tasking for skincare as well as hair care remedies, from stretch marks to cuticles.

I’m already benefitting  from just a few drops of Jojoba applied to my face before putting on a night cream. My skin feels softer, and pores seem more refined.

Because the composition of the oil is similar to natural sebum, it will regulate sebum production by tricking your skin into thinking it already has produced enough sebum.

Since I’ve always had a rather shiny T area, this is going to be helpful in reducing the shine. It involves just using a couple of drops rubbed in my palm to distribute it evenly across my forehead and around my nose.

WIlkinson Argan Oil3. Argan Oil

Wilkinson

My best find was the Argan Oil in Wilkinsons of all places! This bottle was just £2.50, and even though it’s plainly packaged, it is an oil that’s in a lot of trendy new products at the moment. With plenty of natural skin and benefits, I’ll be trying out a few skin and hair remedies with this oil.

Will share with you as soon as I’ve worked out how to include in a hair styling spray to replace the commercial one that I’ve been using.

Hearty Autumn Minestrone Soup with Cavolo Nero

Minestrone Soup with Cavelo Nero

Some lovely Cavolo Nero leaves arrived in Friday’s Organic veg box and we decided they would make for a lovely hearty autumn soup.

The dark green leaves of the Cavolo Nero are also known as Black Kale and like Kale are full of vitamins, A, C and B, not to mention fibre, calcium as well as minerals.

Cavelo NeroIt has a sweet flavour, and I think it’s an easier veg to tempt kids to eat more  greens.

Since it can be used in so many ways, in a soup, or lightly braised with garlic or onion, it makes a great accompaniment.

For lunch, we wanted a hearty soup that would serve as the main meal, served with crusty bread or these soft chewy pretzels from a local bakery.

There is something warm and comforting about the smell of minestrone soup gently cooking away on the stove that makes a weekend seem to last that bit longer.

As there is no set recipe for minestrone, it’s just made out of the vegetables that are in season and can be vegetarian or contain meat.

After a quick rummage around our fridge and grocery cupboard, here’s what we used for the soup:

Ingredients:

Chicken stock was made with the left over carcass of a roast chicken we had previously cooked for a meal. If you want to skip this, a stock cube or ready made stock can be used instead.

Light Olive Oil (1-2 teaspoon if necessary)

Bacon lardons or pancetta

1 or 2 sticks of celery (chopped to the same size as the bacon lardons or pancetta)

2-3 Baby leeks (or large leeks trimmed to remove the thick green leaves, use the tender middle section of the leeks if possible). Chopped to the same size as the pancetta/celery

Baby Sweet Corn chopped (Alternatively Carrots if you have these instead)

Cauliflower florets chopped (optional)

A hand full of mushrooms. Chopped

Peeled Chopped tomatoes (x 2)

1-2 cloves of garlic

3-4 stems of Cavolo Nero leaves, or any green leafed cabbage you have to hand (Savoy works as a great alternative, as does Chinese Leaf – this would make the soup look lighter in colour). The leaves should be finely chopped – to the size of the pancetta or bacon lardons that are being used in the soup.

A cupful of small pasta shapes for soups (We had the small star-shaped pasta called Stellini)

To make:

In a very large pan, fry off the bacon lardons or pancetta. It’s the saltiness of the bacon that will infuse with the vegetables making it very tasty.

Add chopped leeks, mushrooms, baby sweet corn, cauliflower, peeled tomatoes, celery, garlic, gently saute in pan, once the vegetables are soft. You can add some light olive oil if the fat from the bacon is not enough to keep the vegetables from sticking to the pan. The aim is to soften the vegetables in the pan with the bacon.

Once the vegetables have been softened, pour in chicken stock and simmer gently for a minimum of 20 minutes. Longer if possible. The goal is to let the vegetables, bacon and chicken stock work together for maximum flavour.

Just before serving add the pasta shapes and Cavolo Nero leaves and simmer until the leaves and pasta shapes are tender.

Enjoy!

Sunday Spa Feature – Honey and Vanilla Ultra moisturising Foaming bubble bath

honey and vanilla bubble bath (5)The last couple of weeks have been hectic. In the midst of moving the blog to self hosting, I’ve also decided that the windows in our bedroom will not last the winter without some restoration and repair.

Although our house does not have very high ceilings, I am not very tall, which means that I have been using a step-ladder to reach the top of the windows. My hands have been scrubbing, sanding and painting, and the rest of me is well and truly tired, I ache from leaning over and using muscles that are not used to all this hard work.

Yes, I admit it, I prefer being a couch potato, at home curled up on a sofa with a good book.  All this work has been physically demanding and I’m just not used to it.

At some point, if the room gets finished, I may share it, but before this happens, it will need a large dose of Marie Kondo’s Joy of Tidying Up before I’m able to do any kind of reveal.

So, all week, after each day of working on the windows, I’ve been  looking forward to a long soak in a bath-tub full of scented bubbles. In my bathroom are various tempting bubble baths, you know the kind that foams up so you can sink into soft fluffy clouds of bubbles.

However, I can’t help thinking that they are actually not going to do my skin much good, particularly my hands, which have now have a couple of blisters from holding a sander and paint brush,

I’ve a large jar of coconut oil in the cupboard, some orange blossom honey which I thought could be used as the main ingredients in a bath.

Both of these ingredients are great for skin and since I’m looking for ingredients that will calm and soothe, here’s the ingredients that made it into the foaming bath mix:Orange Blossom Honey, Castille Soap, Coconut Oil

Coconut oil is widely known for its ability to repair the skin barrier and reduce inflammation. You can read more about it’s amazing benefits in this article from Harper’s Bazaar.

Honey of course is high in natural antioxidants and is amazing for its healing properties.

Vanilla extract – this is an ingredient that I keep for cake making, after doing a bit of research, not only does it smell and taste yummy, turns out Vanilla is excellent for skin too!

It’s been used as a traditional remedy to heal burns, wounds and cuts – this is going to help heal my blisters! You can read more about its benefits in this article about Vanilla

I came across this recipe looking for things to make with the bottle of Doctor Bonner’s Castile Soap.

Apparently for lots and lots of fluffy bubbles, egg white added into a mix with oil and Castile Soap will make it bubbly.

(Guilty pleasure/confession – I had a double egg yolk fried egg for breakfast this morning as a result of using the egg white in the bath)

The ratios needed to make a frothy bath are as follows:

1/4 cup of coconut oil

1/8 cup of Orange Blossom Honey

1/4 cup of Castile Soap

1/2 egg white

1/2 tablespoon of Vanilla extract

This is the easy part, which is great as I’m tired – just mix all the ingredients together in a large jar and pour into a warm running bath. (Coconut oil stays solid at room temperature, to mix it into the Castile soap, I’ve heated it gently, in a jug of hot water, so it’s melted before adding to the honey and soap mix).

The bath is ready, a couple of scented candles have been lit and I am ready to wallow in the soft frothy bath.

hmmmm bliss!

Easy Tray Baked Salmon with Roasted Veg

image

We decided to treat ourselves this week to wild salmon.

Most of the time, it’s much more economical, if you are cooking salmon to go for the farmed kind of salmon. It is better for the environment, particularly if you select the type of farmed salmon that comes from responsible, sustainable fisheries. But this time, we treated ourselves to the wild variety, still from sustainable sources, which means that when the fish is caught, it is done responsibly and does not deplete the stock of wild salmon in the rivers.

Wild salmon has a different texture to farmed salmon, the flesh is denser and there is less fat, I think it’s because the fish have been swimming in the wild and are exercising a lot more, it’s a little bit special treat on a few occasions.

Some years ago, I learned about sustainable fishing whilst working on a project. It made me think more about where food comes from.

You can visit the website about Forever Fish to find out more about fish and sustainability,  I think we should all try to do our bit, however big or small. Since then we try to choose sustainably sourced fish whenever we can.

Back to the recipe:

This is such a simple dish to make and comes from Jamie Oliver, we first watched him prepare this on telly a long time ago. It’s one of those simple recipes that you don’t really need a recipe book for once you’ve made it and discover how simple it is.

It is so tasty, I wish you could be transported to within the photo to be able to smell the lovely scent of the wild salmon with roasted veg.

In a pre-heated hot oven, (220 c) put a deep roasting tray in with a drizzle of olive oil.

Place two salmon fillets into the tray, season with salt and pepper and lemon juice, on the other side of the tray, place your vegetables into the tray.

I think in Jamie’s original recipe, there are olives, fine green beans, small baby tomatoes, garlic and a small tin of anchovies, but you can use any type of veg as long as it’s been cut fairly small – such as baby sweetcorn to change things up a bit.

It’s the anchovies that make this dish so flavourful, infusing their briny saltiness into the vegetables so that the taste of the sea comes to life.

With all the juices from both the veg and salmon mingled together, this is what makes this taste so stunning.

We like this with french fries or on this occasion, we made these little cubed roasted potatoes, just par boil the cubed potatoes so that they are just on their way to being cooked, put them in a hot tray that’s had some olive oil heating in the oven. Smother them with the hot olive oil and bake with the salmon tray bake at the same time. They may need to be put into the oven ahead of the salmon -about 20 mins for the potatoes, depending on how big the cubes have been cut.

The salmon and veg, should cook in about 10-15 mins (check at around 10 mins) as it depends on the thickness of your fish fillets and how you prefer them – well cooked or just done.

Enjoy!

Banana Loaf with Sour Cherries and a Cinnamon Crunch topping

Banana Loaf with Sour Cherries and a crunchy topping

I’ve been clearing out our grocery cupboard. Every few months, I make an effort to purge our groceries to make sure there is nothing lurking in the back of the cupboard that is going out of sell-by date.

It sometimes reveals some interesting finds.

Today, I found these dried sour cherries. I don’t remember buying these, so it must have been my hubby. At any rate they are about to reach the end of their shelf life. Rather than waste them, I decided to put them to use in a cake.Sour Cherries, bananas, dried apricots

Since I also had some bananas which were going very brown, they were now not so great looking in the fruit bowl but would be perfect for this Banana Loaf.

Ingredients:

75g Dried apricots (dried squishy fruit such as apricots if you have them)

75g Sour Cherries

Zest of 1 lemon

100g Unsalted Butter (softened but not melted)

125g soft brown sugar

2 large eggs (free range if possible)

2-3 large ripe bananas

200g self raising flour

Loaf tin (13x23x7cm)

Loaf tin paper case (optional)

For the crunchy topping: (this is optional)

1 tablespoon soft brown sugar

1 tablespoon butter

1 tablespoon of Rolled Oats

1 teaspoon of Ground Cinnamon

To make the cake:

In a bowl, mix together the Sugar, Butter and eggs. Combine them until it is a soft batter. Add the chopped fruit (apricots and sour cherries) along with the zest of 1 lemon.

Mash the bananas until they are gloopy and runny and add these into the bowl and stir gently.

Add sifted self-raising flour gently, I tend to put the sieve over the bowl and gently tap in the flour, folding in the flour into the mixture. It should look a little lumpy, (making sure that there are no pockets of flour in the mix).

Spoon into the loaf tin as evenly as possible (it will spread out as it cooks).

My eldest made the crunchy topping at school during one of the cookery lessons and she showed my how to make this delicious topping.

To make the crunchy cinnamon topping:

In a Saucepan, gently melt the soft butter and soft brown sugar, add in rolled oats and ground cinnamon, making sure you coat all the oats with the cinnamon and buttery sugar. Once golden brown take off the stove and add small dollops of the mixture over the top of the cake mix that is in the loaf tin. As it cooks the small dollops of oats mixed into the butter and sugar will turn cook with the loaf and give a wonderfully fragrant cinnamony crunchy texture to the cake.

In the pre-heated oven, bake on 160c for about an hour (check around 50 mins to see if the cake is ready). It’s ready when you can put a skewer into the cake and pull it out clean.

This cake can be eaten hot from the oven but can be stored for a couple of days in an air-tight container to keep it moist.

Sunday Spa Feature – Rice and Lemon Skin tone brightening face mask

You can be gorgeous at thirty, charming at forty, and irresistible for the rest of your life.” Gabrielle Chanel

Rice Powder facemask with honey and lemon

Skin Brightening Rice Powder facemask with honey and lemon

My skin is what can only be described as mature, I am fortunate in that I have Chinese skin which doesn’t wrinkle so much, but the signs of age are starting to show. Since Chinese skin is more prone to pigmentation and age spots, I have always used a sunscreen and kept out of direct sunlight as much as possible.

Yesterday, though, in spite of all the sun protection, the little dark marks on my skin seemed more noticeable and there were a few more freckles which must have appeared while we were on holiday. Even though I have been using Clinique’s dark spot corrector and day cream, it looks as if my skin needs more help.

Whilst I like the idea of aging gracefully, with the signs of age acting as markers that define who you are, I think it’s equally important to do as much as possible to maintain healthy looking skin,

Thinking back to a time when I was at home with my mum, she would use rice in many of the beauty treatments she made at home. I think history must be repeating itself, my daughter calls me a hippie because of my enthusiasm for all things home made. I used to think the same of my mum.

So back to the ingredients for the skin tone brightening face mask – Rice is the staple food in Chinese cooking. It is also an ingredient that features in many beauty products. My mother used to keep the rice water (soaking the rice removes the starch to help improve the texture as it cooks), rather than throwing away the starchy water, she would save this and use it as a toner.
It contains PABA, (Para Aminobenzoic Acid) an ingredient you find in expensive skincare products, as well as ferulic acid, (an antioxidant), allantoin (anti-inflamatory) as well as vitamins C and E. In recent studies, it has been proven that rice and ricewater can improve and brighten skin. Some have even reported it can give skin a translucent glow.

As I want to use Rice in a facial, the best way to do this is a face mask using the rice in a powder form, so that all the goodness in the rice can soak into my skin.

I have simply put a small handful of Jasmine white rice into a hand blender pot and whizzed this until the rice has become a fine powder.

Once the powder is ready, add a teaspoon of honey, this is great for skin as well. I like to use this in masks because it will bind and hold the rice powder in place on my skin and act as a moisturiser.

I’ve included a very small amount of lemon juice and grated the skin of the lemon peel, both of which will also have a lightening effect on skin. But on their own, I think would be too harsh on mature skin, so just a teaspoon of lemon juice.

I’ve included some rosewater to make the paste the right consistency (You can add more if the paste is too thick),

Spread the facemask on your face and leave for 15-20 minutes. I love using a face mask on a Sunday morning soaking in a bath whilst the kids are still asleep – there’s just enough me time before the house awakes.

Once you’ve finished with the facemask, wipe away with a warm towel and follow with a facial toner and moisturiser as usual. There’s just one last thing, if you’d like to make your own  Rosewater cleanser and toner in one, click on the link for the recipe.

Home detox

Home made all purpose cleaning sprayCleaning the house is not something I enjoy. I try to avoid it until it becomes unavoidable.

It takes up so much of precious time at weekends that I am left grumpy at the thought that the endless cycle of cleaning has eaten away at the precious time I’d like to spend doing other things with the family.

In an effort to find ways to cut down, simplify and find short cuts, I’ve been looking at a number of blogs.

There are so many hints and tips to help you get through the household chores and I’m beginning to learn by doing.

I came across a number of blogs that recommend using Vinegar and Bicarbonate of Soda and adding essential oils for their antiviral and antibacterial properties and also to remove the smell of the vinegar.

home detox (2)We’ve been using this distilled vinegar from a Chinese Supermarket. It was in the local Chinese Supermarket in Mitcham that we sometimes go to stock up on Chinese ingredients.

The place caters for both those in the catering business as well as for people who are looking for Chinese specialist food and ingredients.

I love the smell of the supermarket and walking round, there are so many interesting things to look at, most of which I have no idea what they are or how to cook with them.

Compared to other distilled vinegar you can get, it is a little different and as it was the one white vinegar we had in the cupboard, I decided to use it, rather than go and buy another one, which I think would defeat the purpose of trying to simplify and cut down on the number of cleaning products around the house.

We bought it to remove limescale from our kettle, and it works really well at this job. I am sure that there are Thai recipes, with lovely sauces to try with this Vinegar, so will look them up for another time.

Since reading a the blogs about how to clean and organise a home, I decided to try making the bathroom all-purpose cleaner from Clean Mamas post – you can read it here. It seemed simple enough, water, vinegar and alcohol. I wasn’t sure though whether it would work without some kind of soap in the mix.

home detox (3)Since I had some fragrance free washing up liquid that had been under the sink, I thought this could be a good option to try. I hadn’t liked it for dishes because I like the smell of citrus when washing dishes, It was pretty good at cleaning though, I just prefer ones with a lemony scent.

With the washing up liquid and the distilled vinegar, I made up the following mix:

1/4 cup of distilled vinegar

1/4 cup of vodka

1/4 cup of washing up liquid

3/4 cup of water

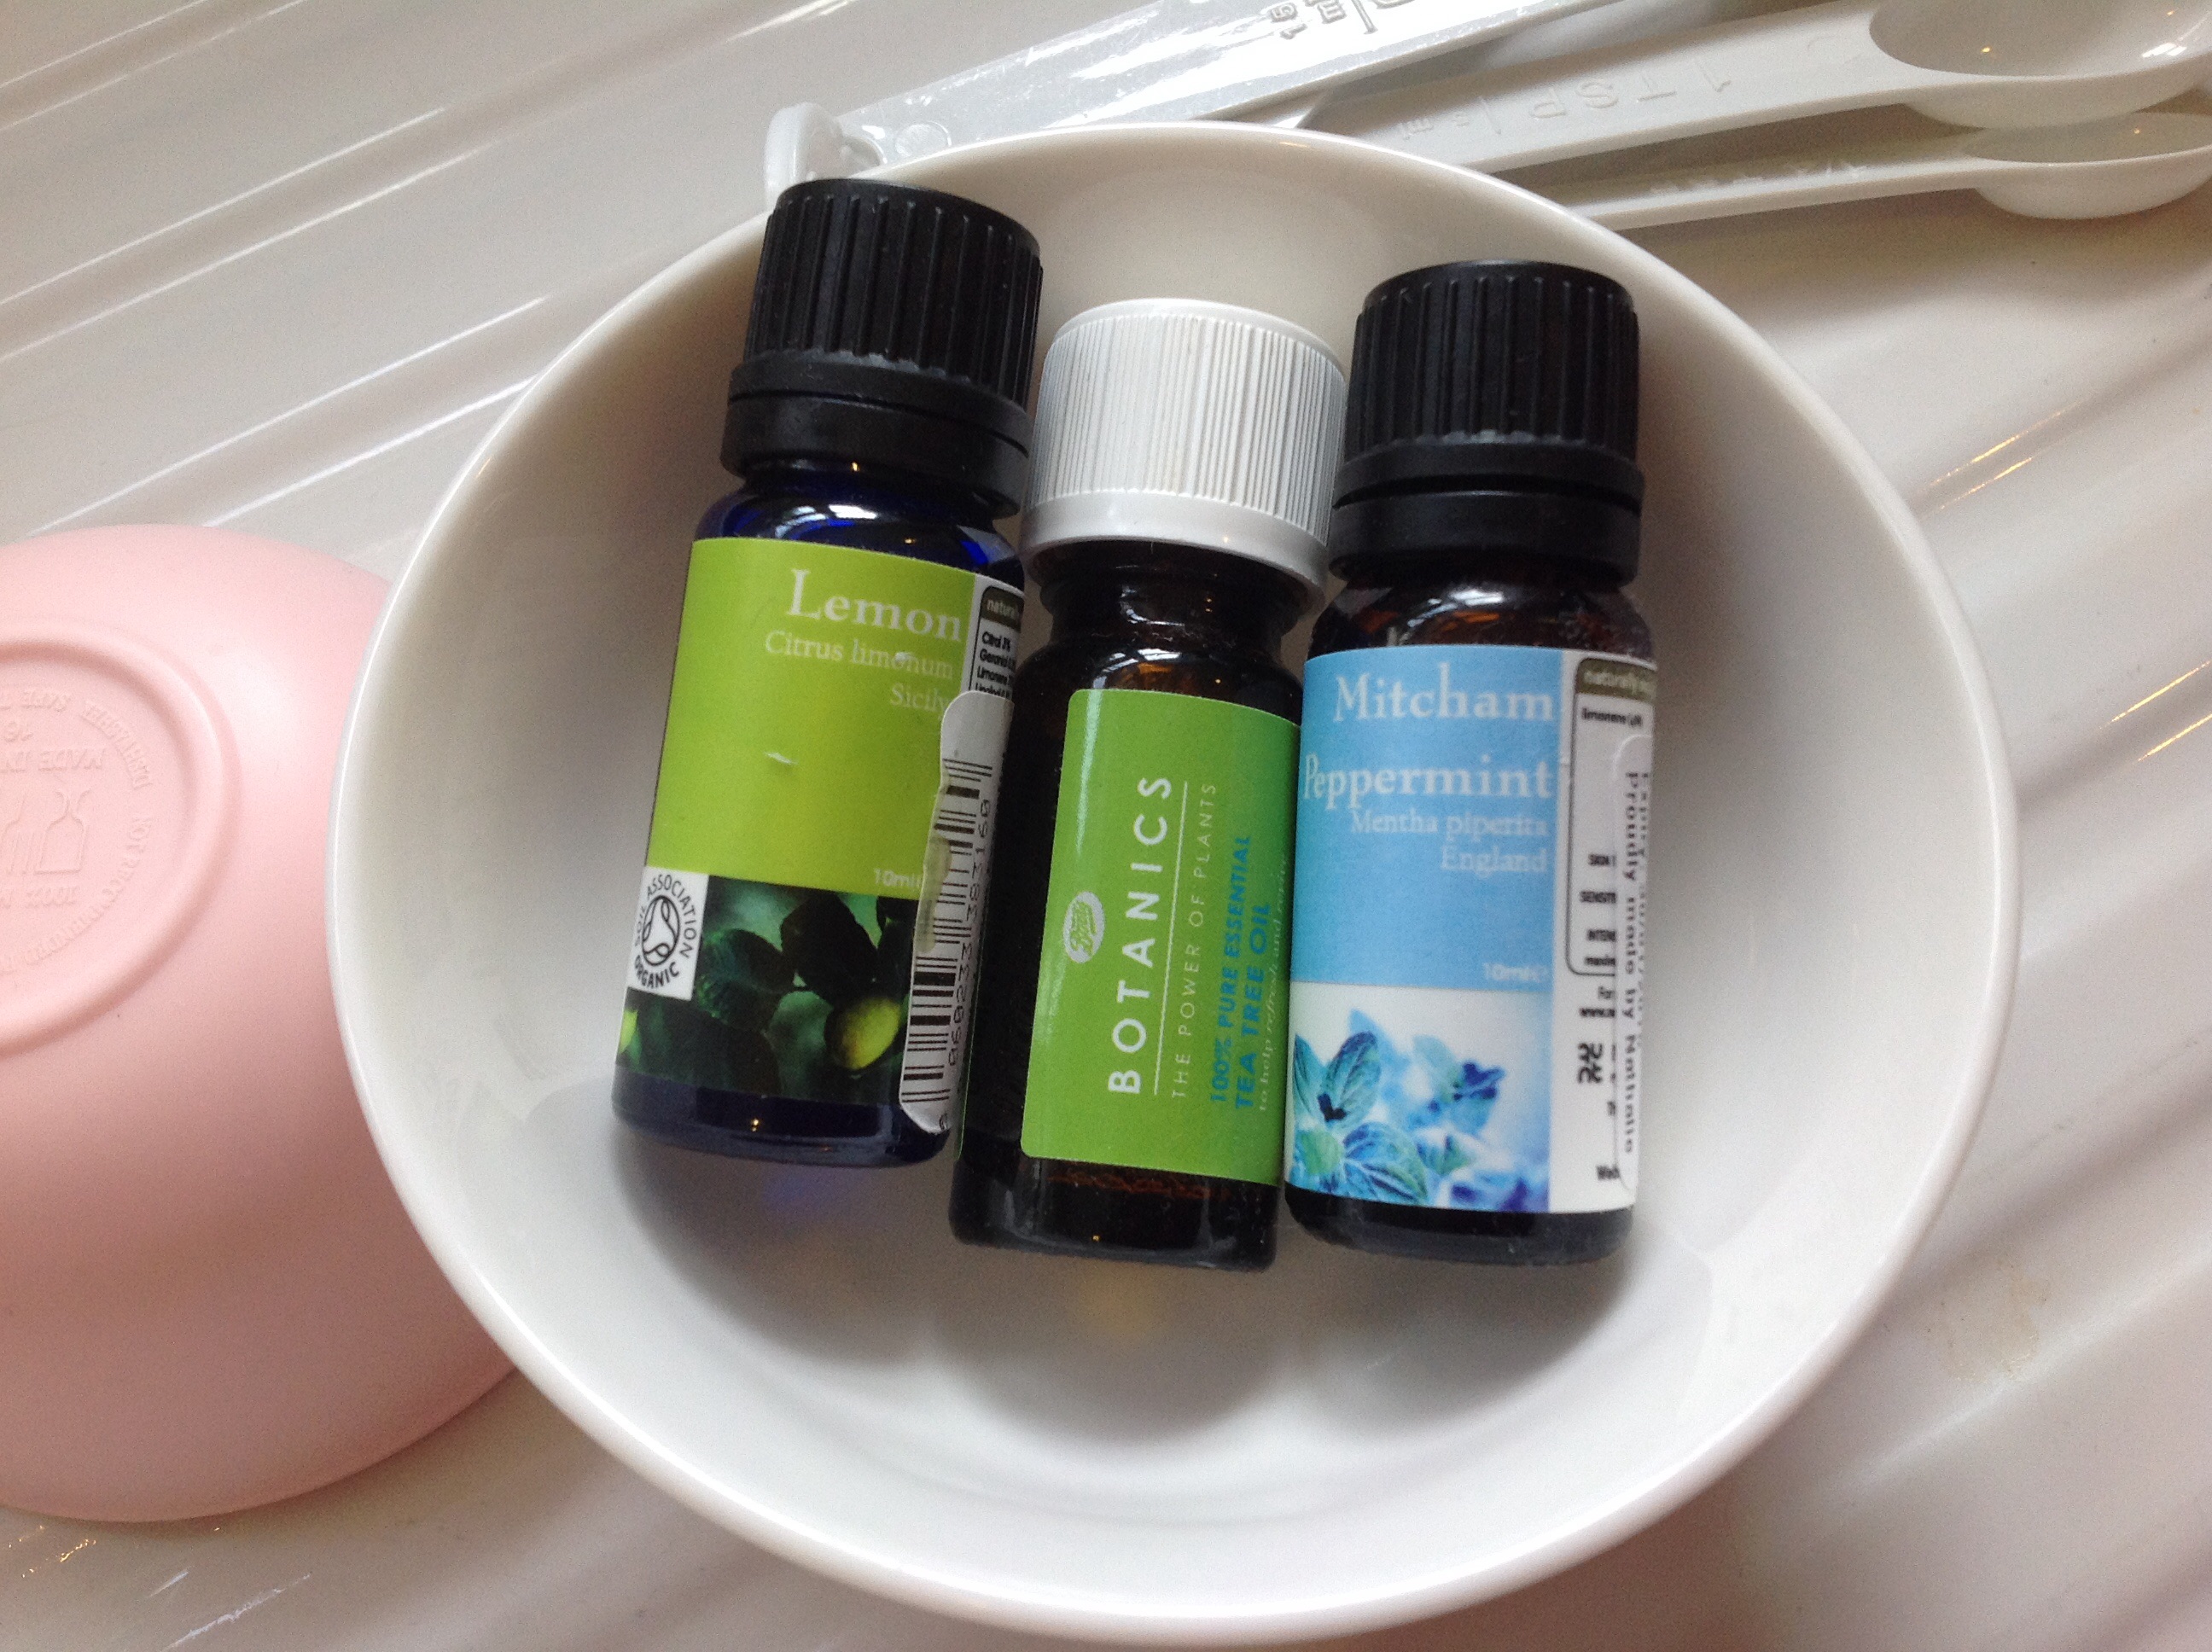
Lemon , Tea Tree and Mitcham Peppermint essential oil

Lemon, Tea Tree and Mitcham Peppermint essential oil

(If you want to make more than this just use the same proportions as above in larger quantity, or follow Clean Mama’s recipe)

As the blog post recommended adding essential oils, I chose lemon for its lovely citrus fragrance. It has antibacterial properties and has an uplifting scent.

Tea Tree Oil is sold in most pharmacies for its anti bacterial qualities.

Since I like the smell of Mitcham Peppermint essential oil, known for it’s antiviral properties, I used this as well.

A cleaning detox that means no more harsh chemicals around the house and a simpler way to clean.

I put equal amounts : 10 drops of lemon, 10 drops of Tea Tree and 10 drops of Peppermint oil in with the vinegar, water and alcohol.

As I’ve just finished an Ecover multi purpose cleaner in a spray bottle, I decided to recycle it for this home-made cleaner.

I rinsed it out with some water, put some bicarbonate of soda in and left it over night, rinsed it out to remove as much of the chemicals as possible. With all the ingredients added into the bottle, I put the top on and shook it up to make sure all the essential oils were combined into the other ingredients.

I’ve been using this home-made cleaner for about a month, it’s good on kitchen counters, sinks, baths and the loo.

Because the spray is homemade, I’ve not thought of cleaning so much of a chore now. In fact as I clean, I look and inspect to see whether the spray is cleaning as well as the shop bought cleaners available.

I think it does a better job. The sink and bath are shiny and there isn’t any streaking on the shiny chrome surfaces.

home detox

The air doesn’t have the heavy artificial fragrance of commercially bought cleaner and now that all the scents have had a chance to combine, I can smell the sweet uplifting scent of Peppermint and lemons. The bathrooms just seems fresher and the surfaces of the ceramic sinks look just as shiny.

Using the spray with a little Biocarb gets the grime lifted away far better than the commercial cleaners I’ve tried, so that’s reduced the number of cleaner products I use around the house and saved on storage and my wallet – Brilliant!

Do let me know if you have a cleaning tip / idea to try.

Cinnamon Muffins with Fresh Blueberries and Walnuts

Cinnamon Blueberry Muffins with Walnuts

I’ve been wanting to make something that brings the sweet warm smell of Cinnamon into our home, now that the nights are drawing in and Autumn is showing it’s first signs of arrival.

Yesterday, (Wednesday) it rained so much that even though  both my kids were wearing their rain coats, when they arrived home it was two wet and soggy girls who needed something cheerful to chase away the dreary weather.

Taking a rummage around our cupboard, we have a very small amount of plain flour and some wholemeal flour. In our fridge was a fresh pack of blueberries that we had to put into our youngest’s lunch bag as a snack.

These ingredients will make one of my favourites – Blueberry Muffins.

I first tried this recipe in the early 90’s when Delia Smith shared the recipe and how to bake them on telly.

The recipe and they way they were baked were a revelation, not only did she use fresh berries, (The cakes I had been taught at school had been sponge cakes, or fruit cakes usually made with dried fruit, so weren’t exactly inspiring or tasty) she showed us how easy it was to make American style muffins and most importantly they looked so yummy.

I hadn’t really thought much about baking until that is I made these muffins and realised how easy they are to make and the way they make a home smell so warm and so delicious.

The fresh blueberries burst as they cook and when you bite into these muffins, because some of the blueberries haven’t quite exploded, they’ll do so as you bite into them, so you get the hit of the warm tangy flavour of the berries, along with the sweet taste of the muffins.

Fresh Blueberries bursting in a muffin

Fresh Blueberries bursting in a muffin

I’ve adapted the recipe slightly because I want to combine the fresh blueberries with walnuts and bring in the scent of Cinnamon.

For an extra kick of Cinnamon, I’ve added a caramelised brown sugar topping that gives the muffins a lovely crunchy texture to bite into.

You can of course make these into smaller sized cupcakes, (this recipe will make approx 12-14) but since we’re eating these for our desserts tonight, they’re being baked in our “Man Sized” muffin tin to serve warm straight out of the oven with a dollop of whipped cream or vanilla ice cream.

The ingredients below will makes approx 6-7 large man-sized muffins

Ingredients for the muffins (Adapted from Delia Smith’s American Muffin recipe)

2.5 oz plain flour (75g)

2.5 oz wholemeal flour (75g)

half level tablespoon baking powder

quarter teaspoon salt

1 large egg

one and a half ounce soft brown sugar (40g)

4 fluid ounces milk (110ml)

2oz butter, melted (slightly cooled)

half teaspoon pure vanilla extract (optional)

quarter teaspoon ground Cinnamon

4 oz small blueberries

2 oz Walnuts (Pecan nuts work as well) finely chopped

Muffin mix in tin before baking

Muffin mix with crumble topping in tin before baking

For the crumble topping:

1.5 oz brown sugar

1.5 oz self-raising flour

1.5 oz butter

1 oz walnuts (chopped finely, any nuts if you prefer a different type)

Half teaspoon Ground cinnamon

How to make the muffins:

Sift the flour (You can of course just use plain flour, but we had wholemeal, so I used half and half) with baking powder, Cinnamon and salt into a large bowl.

In a separate bowl whisk the sugar, eggs and butter (melted) and milk together. This time I remembered to put the sugar in!

Fold the dry mixture very gently into the wet batter mixture, the consistency should look lumpy and well, wrong as there should be lumps and bumps everywhere. (Sifting the flour is important to make the muffins light and airy)

Spoon in the blueberries and the finely chopped walnuts. I like pecans with this recipe too, and I think they will work just as well if you like Pecans instead of walnuts. Very gently again, to maintain the light texture of the batter.

Spoon the mixture into the muffin tins. I’ve used these foil muffin cases as it’s easier to get out of the tins and less mess to wash-up.

To make the topping:

Ingredients for the crumble topping

Ingredients for the Crumble topping

This is really simple to make, it’s basically a crumble mixture. Mix the flour, cinnamon and butter and crumble together with your fingers, add sugar and hazelnuts and mix together so that it looks like a very fine crumble mix. Sprinkle over the muffin mixture in the muffin tins before putting them in the oven.

Bake in the oven for approx 20-25 minutes (if you’re going for the Man size versions), 15-20 minutes for the smaller cupcake versions.

Take muffins out of the tins – (they are cooked if you can put a knife/skewer through and it comes out clean). Serve immediately if you want to eat them hot. or let them cool on a baking rack. They can be enjoyed for a day or two afterwards, but really I think they’re yummy straight out of the oven.

Enjoy!

Feast and Famine on the 5:2

Salad with sliced chicken

I’ve never been able to maintain my weight or more importantly my size by sticking to a diet.

About a couple of years ago, I stumbled upon a programme on telly which has made a significant impact on my lifestyle.

If anyone reading this post isn’t familiar with the 5:2 diet, visit the Fast Diet site which explains the health benefits of fasting two out of 5 days of the week.

So here’s the thing, I resent the notion of giving up indulgent treats such as cake or chocolate or a really great fry-up. Missing out on Peking Duck as part of a Chinese feast or a fully loaded Sunday roast, is my idea of hell, so I hated dieting and gave up easily when the smell of something lovely was being cooked by my husband for the rest of the family. I could never resist.

So re-training myself to fast for 2 days each week so that I could eat normally on the other 5 days (as long as they’re not consecutive days) seemed achievable, so I gave it a try and haven’t looked back.

On a fast day, I eat a couple of rice crackers with coffee and a glass of water with lemon juice for breakfast – just so that there’s a routine for breakfast, lunch and dinner.

At lunch, it’s usually a bowl of salad leaves, some cucumber, tomatoes, maybe some radishes or a carrot that’s been cut into thin ribbons,with a slice of chicken or ham torn or shredded into the salad. If I am home, a few leaves from the fresh basil on my kitchen window sill will get added to the salad to make it more fragrant with a dressing of just balsamic vinegar.

Dinner might be a bowl of soup, this can either be tinned soup or home made that I’ve watered down, along with some rice crackers or a light broth and a few noodles.

As long as the total amount comes to 500 calories. I keep things simple on fasting days when my brain and stomach is too hungry to work on cooking something complicated.

I’ve figured out that rice or corn crackers are about 30 calories each, a bowl of salad is around 50-100 calories depending on the sliced meat I’ve added (A boiled egg is about 90 calories) or noodles (I use half of a serving of dried noodles and cook with chicken stock, Miso or some soy sauce). Anything goes as long as the total is about 500 or less. Dinner might just be a banana for instance.

It works for me because it’s simple to remember to stick to a schedule of 2 days of fasting in a week, usually a Monday and Friday.

Yesterday, however, I had a big meeting to attend and I didn’t want to think about an empty stomach.

So today, I’m fasting and whilst my kids are indulging in their hot chocolates. I tell myself it’s only a day. Tomorrow I can feast.

So simple and effective. I’ve lost about three-quarters of a stone and kept it off.

Previously, I’ve lost weight then piled it back on when I’ve stopped dieting and feeling guilty when I’ve fallen off the wagon.

If I miss the 2 days fasting in a week, I don’t feel the guilt, I’ll simply restart the routine the following week.

This works because there are times when I want to be indulgent with food full-on, such as when we’re on holiday or at Christmas or Chinese New Year.

Just to be clear, fasting for consecutive days, for long periods of time is not healthy and It goes entirely against the approach and principles of the 5:2. The aim is to eat a healthy balanced diet with normal portion sizes on the 5 days when not fasting.

This approach is quite the opposite of being on a diet, and has become part of my lifestyle. When I think of it in this way, I don’t feel as if I’ve given up on all the pleasures that food has to offer.

Do let me know if any of you are using the 5:2 and maintaining a healthy and balanced approach to food. I’d love to know if you have any tips to share.

Sunday Spa Feature – Deep Exfoliating Facial Wash with Poppy Seeds

Poppy Seed Exfoliating face wash

For this deep exfoliating facial wash, I have chosen to use Poppy Seeds as they are full of minerals such as calcium, potassium, magnesium and iron.

In food they are commonly used to add flavour to cereal and salads. I like to include them in cakes to add texture and a bit of crunch.

In herbal remedies, the milk extract of poppy seeds mixed with some sugar is a great way to help you to sleep. Try crushing them with brown sugar and adding them into a warm milky drink before bedtime.

Poppy Seeds are known to be a natural skin remedy for skin infections like dry itch and skin rashes, as they contain anti-inflamatory compounds.

For this deep exfoliating facial wash, I have found an effective way to give my skin a powerful deep clean, polish away dead skin and improve the texture of my skin.

As I have a mild Castille Soap, I can use this as the base for the wash and add to this the exfoliating effect of the crushed poppy seeds.

Simply mix a teaspoon of Baby Castille Soap (I am Using Doctor Bonner’s fragrance free Baby Castille Soap) with half a teaspoon of crushed Poppy Seeds. You can of course use your normal face wash and simply add the crushed poppy seeds to your facewash to give your face wash the exfoliating properties of the poppy seeds.

By crushing the poppy seeds slightly,(I have used a pestle and mortar for this) this releases their healing properties (they are high in linolenic acid) which are known to help sooth skin irritations as well as benefitting from the exfoliating nature of the small tiny seeds.

I have added 1 drop of Lavender Essential Oil as well the oil is well-known for its effectiveness as a treatment for skin that is prone to breakouts.

Along with lavender I have added 1 drop of Lemon Essential Oil, a good remedy for treating skin pigmentation, to help even out my skin tone.  It is also astringent and detoxifying in nature.

I love the fragrance combination, which will add scent to the facial wash with the lovely aroma of lavender and lemons.

Once combined, I have dampened my face with warm water and gently rub the exfoliating mix onto my skin in small circular motion. This will also stimulate and massage the skin at the same time.

Rinse off with warm water and pat dry.

As this will give skin an extremely deep cleanse, I am using a gentle toner to complete the cleansing routine, using a blend of Rosewater and Glycerine.

This has left my skin glowing, hmmmm lovely.