Handmade Christmas Gifts – Peppermint and Cedarwood Foot Salve


Every year, I look for gifts to give friends and family that are unique, thoughtful and show that their tastes or what they like have been considered and reflected in the gift.

On most occasions, their gifts to me have out done me in every respect, so this year to show my appreciation, the gifts I’ve made are uniquely personalised. Even better, I’ve not spent any time walking around shops trying to find something special, because the ingredients are already in the cuboard ready to be made into something special and take very little time or effort to prepare and make.

If you have ever tried the Shea Butter Hand and foot cream from L’Occitane or from Burt’s Bees, these are lovely little gifts to give and receive. The only thing is that there’s a possibility that someone else has had the same idea and purchased the very same. They smell wonderful, with a range of delicate scents and I must admit are lovely gifts to receive.

To make these Foot and hand Salves is very simple, easier than baking a cake in fact. All you need to do is measure out the ingredients, gently melt them in a jug in a pan of simmering water, add the essential oils and once melted, pour into your chosen containers. Personalising the scents makes these gifts unique, especially if you know what scents they enjoy the most.

Ingredients for the footsalve:

1 tablespoons of Argan Oil

2 tablespoons of Coconut Oil

1 tablespoon beeswax

4 tablespoons of unrefined Shea Butter

1/4 tsb of essential oils – a combination of Peppermint and Cedarwood (for the boys) or Peppermint and Lavender (for the girls)

To make the Hand Salve variant, you can change the oil and use Jojoba or Rosehip Oil, whichever you think their hands (or your own) will appreciate the most and add your choice of essential oils to add scent. Beeswax and the Shea Butter will emulsify and give the salve it’s lovely thick creamy texture.

Better still, if you want to make the Handsalve to treat age spots (after all, most beauty mags will tell you it’s your hands that show the first signs of aging) select the essential oils for their skin therapeutic benefits.

That’s it. All there is to it for making scented rich moisturising salves. Perfect as a gift or an indulgent luxurious treat. Hmm I think I’m going to find a bit of me time for a Manicure and try some of the handsalve I made.


Sunday Spa Feature – Rosehip, Argan, Jojoba, Sweet Almond facial oil

Facial Oil Serum with Rosehip, Argan, Jojoba and Sweet Almond OilThis is such a great facial oil for anyone of any age and would make a great Christmas gift if you are looking to find a gift that’s easy to make.

Rosehip Oil has been in the beauty news having been cited as the wonder oil used by celebrities such as Miranda Kerr. It is a natural source of Vitamin E which you’ll find in many skin care creams, used for it’s antioxidant properties to calm, hydrate dry and sensitive skin.

The oil is also rich in fatty acids such as linoleic acid (or omega 6) as well as linolenic acid (or omega 3). High in Vitamin C, it will help to speed up the healing process for skin damaged by burns, scars or age spots as well as hydrate and add moisture.

I’ve chosen this as it’s the dry oil, it does not leave any feeling of grease and absorbs very quickly into the skin.

With the properties that feel more like a serum than an oil, when I found it online, it gave me an idea for creating a nighttime facial oil that would help rejuvenate and revitalise skin.

With this oil, I have combined it with 3 other oils:

Jojoba oil, which also non-greasy and has a similar consistency to sebum. A liquid wax, found in the seeds/nuts of jojoba plant, it has anti-microbial properties and contains iodine which prevents bacteria from forming and is, therefore, good for skin that is prone to blemishes

Sweet Almond oil, not only does this oil contain plenty of vitamin E, it has lots of minerals such as Calcium, potassium, magnesium as well as vitamin D. Good for dark circles under the eyes, blemishes, fine lines, wrinkles and helps to firm skin.

Argan Oil, high in fatty acids it helps to restore skin’s elasticity and leaves skin feeling plumper and softer.

To give this luxury facial oil some fragrance, I have combined this with three essential oils, which also have skin rejuvenating properties.

Ylang Ylang  Essential Oil- I’ve written about this oil in a lovely home made bath-soak. It has an uplifting effect and can give you feelings of joy and hope. It has a rich floral fragrance which should be used sparingly particularly for skincare purposes.  As it helps to control oil production, minimises breakouts and helps regenerate skin cells, I’ve included this in the facial oil

Jasmine Officinale – is my favourite scent, reminds me of my early childhood, it is used in so many ways, I love its scent in green tea as well as in perfumes such as the Jo Malone’s Jasmine and Mint cologne spray. It tones dry, greasy, irritated skin and helps to fade scars and restore elasticity to the skin.

Lavender Essential Oil – there are so many uses for lavender, that it is one of the oils which I take everywhere and use it in so many ways. In a bath soak, foot scrub it’s lovely scent is relaxing and calming. It is also a good antiseptic so I like to use it as a room and linen spray. It helps to reduce age spots, fine lines and wrinkles by boosting the flow and supply of oxygen and nutrients, helping to boost the skin’s renewal process.

To make this facial oil, which I’ve called the Fourtifying Facial Oil, just mix the following together:

15ml of Sweet Almond Oil

15ml of Argan Oil

15 ml of Rosehip Oil

15 ml of Jojoba Oil

1-2 drops of Ylang Ylang essential oil along with 1-2 drops Jasmine and 1-2 drops of Lavender.

Shake the bottle thoroughly to combine. I’ve used a blue glass bottle with a dropper to make the experience the same as if the facial oil is one of those high-end beauty serums. You can of course just use a bottle with a stopper or small opening.

To use, only 1-2 drops of the facial oil is needed, add the oil to the tips of your fingers and smooth over your skin, underneath your usual night cream.

That’s all there is to it, now I’m looking forward to bed-time and waking up to soft glowing skin!


Sunday Spa Feature – Argan Oil, Aloe Vera, Sweet Orange and Sea Salt hair styling spray

Hair Styling spray with Argan oil, Sweet Orange and Aloe Vera I debated about whether to post this, given the sombre mood this weekend. I’ve decided to keep with the British Bull Dog Spirit and to keep calm and carry on.

This Post is the regular Sunday Spa Feature for an Argan Oil, Aloe Vera with Sweet Orange and Sea Salt hair styling spray.

It is a very simple to create a styling spray that give you plenty of volume and hold for your hair.

The spray consists of  Dead Sea Salt which will provide the volume and hold. If you don’t have Dead Sea Salt, you can substitute this for Sea Salt, or Sugar, though I am not keen on the idea of using Sugar in my hair in case, well, it might attract bugs!

For moisture, since I have some Argan Oil this will protect hair from heat styling and keep your hair smooth and shiny. I’ve also included some Aloe Vera gel, also known for its mosturising properties.Hair Styling spray with Argan oil and Aloe Vera (6)

To scent the spray, I’ve added a few drops of Sweet Orange Essential Oil, you can of course choose something else. I like the scent of Oranges and since using the spray, I’ve found that the Essential Oil gives my hair added shine, it’s great to combine it with the Argan Oil.

That’s basically, it. Just spray into your hair and style as usual, you can use it for adding volume or texture (spray and leave to dry, as this will add natural definition and texture to your hair).

Not bad for a few ingredients found around the home and best of all, not a single man-made chemical or preservative went into this spray, which means better, healthier hair.

All you need are the following ingredients:

100ml spray bottle

65 ml hot water

35 ml Dead Sea Salt or Sea Salt (about 2 level tablespoons)

1 teaspoon aloe vera gel

1 teaspoon vodka

1 teaspoon argan oil

Sweet Orange Essential Oil

Simply combine all the ingredients into the Spray Bottle. It’s easier if you have a small funnel. To make sure the oil mixes in with the other ingredients, I have added a small amount of vodka (you can substitute this for Surgical Spirit or rubbing alcohol but I find that this has a strong scent and I just prefer vodka because it’s scent free).

Just shake to combine the ingredients before each use.

Enjoy!

Sunday Spa Feature – Orange, Cinnamon and Ginger Cellulite Smoothing Skin Polish

Orange, Ginger and Cinnamon cellulite smoothing skin polish (2)

I’ve been baking with Oranges and Cinnamon this week and the delicious scent gave me an idea for a cellulite smoothing skin polish which is easy to make at home, packed with ingredients that will help firm, tone and smooth skin which might be looking a little bumpy because of cellulite.

Whilst there are many commercial products available, most health and skincare experts would agree that a healthy diet, combined with exercise to stimulate the circulation will help eliminate toxins from your system and therefore improve skin and muscle tone.

Now, I’m not what you call a gym bunny, so to help improve skin circulation, I’ve created a cellulite smoothing skin polish that can be used once or twice a week as part of a spa experience.

The Ingredients that made it into this Cellulite Smoothing Skin Polish:


Dried orange peelOrange Peel

Orange Peel has excellent antioxidant property, containing Vitamin C an antioxidant found in many expensive skin care products, it also contains Calcium, Potassium, Magnesium, minerals which is great for skin. The citric acid in the orange peel that will help to exfoliate and brighten skin.

Root Ginger

Contains powerful antiseptic and cleansing properties, it increases blood circulation. With the heat from the Ginger grated into the skin polish it will gently warm and stimulate circulation to the skin.

Cinnamon

Cinnamon has been used in Asian and Chinese cultures both in food and herbal remedies for centuries.  Cinnamon will boost circulation when applied to the skin and has been shown in recent studies to rid the body of toxins and boost the immune system.

Coconut Oil

Known in it’s ability to moisturise, it’s packed full of antioxidants which work to increase skin elasticity and firmness.

Argan Oil

Rich with Vitamin A and E, Argan Oil is mainly composed of fatty acids (80%) and antioxidants such as linoleic acid. It will smooth, add moisture and rejuvenate skin, no wonder skin care and cosmetic companies have been using this in many of their products.

Dead Sea Salt

The waters of the dead sea are renowned for their therapeutic benefits. Containing lots of minerals such as Magnesium, potassium, calcium chloride and bromides, it increases circulation and helps skin to retain moisture. It has been proven to be effective for easing muscle aches and pains. As the grains of this salt are fine, it can be used as the basis of the skin scrub.

If you don’t have Sea Salt to hand, then soft brown sugar can be used as an alternative.

How to make:

This is so simple to make, as Coconut oil is solid at room temperature, I have put a tablespoon of the coconut oil in a glass jar and in a jug of hot water to melt.

Once melted, combine the Orange Peel powder with the Coconut oil. (I have dried the orange peel first before putting it into a food blender and then blitzing it so it becomes a fine pebbly mixture which will mix better with the oils.) If you don’t have the time to do this, simply grate the orange peel.

Add one teaspoon of ground cinnamon. You can either use the pre-ground powder or grate some cinnamon sticks if you have this.

Grate some fresh root ginger, about a teaspoon or more if you are feeling brave as the heat of the ginger will be very stimulating.

Combine all these ingredients and make into a paste. Add 5-6 tablespoons of Dead Sea Salt and mix together so that the paste of coconut oil, orange peel, grated ginger and ground cinnamon is mixed thoroughly into the dead sea salt.

At this point the mixture will be a little dry and crumbly. Add a teaspoon or two of Argan Oil so that the mixture is soft to the touch but remaining granular for the scrub mix.

You can either use this scrub in the bath, or in the shower, apply a little at a time, rubbing and massaging the mixture in small circular motion into your skin.

You’ll notice not only does it smell great as the scent of oranges, ginger and cinnamon is released into the warmth of a shower or bath, but your skin will get a little pink and and you may tingle all over*, this is from the heat of the spices boosting your circulation and improving lymphatic drainage. The granular salt works to polish and improve the appearance of any cellulite, lumps, bumps and skin blemishes.

The mix can also be used as a bath soak. Just sprinkle into warm running water. It is particularly great for sore aching muscles or as a treatment for the symptoms of a cold or flu.

Once you’ve finished in the bath or shower, if you want to go all out and complete the spa experience, why not try making and using the pampering body oil to lock in moisture to your skin.

*Before trying this recipe, please do a patch test first in case of any skin irritation.


Sunday Spa Feature – Pampering Body Oil Spray

Jojoba Pampering Body oil with aloe vera

With the recent haul of Jojoba and Argan Oil, I’ve been working on a new skin care recipe that is rich, packed full of ingredients to moisturise and pamper dry skin.

The ingredients that made it into this Body Oil:

Aloe Vera.  The version I have is 99.9% pure. It is packed full of nutrients that are great for the skin such as beta carotene, which is converted into Vitamin A, (found also in carrots). It also includes Vitamin C and E which improves skin tone and firmness. It is chosen by skin care brands for its ability to reduce wrinkles associated with aging. I keep a small jar of this in my medicine cupboard, as it has many uses and apply it neat to the kids skin to soothe bug bites and sunburn.

Rosewater and GlycerineGlycerine has been used traditionally in many skin care preparations, such as a facial toner. I’ve been using it in a skin care recipe as an alternative to Micellar Water. It’s a handy all in one facial cleanser and toner, that is great to take make-up off when I’m in a hurry.

As it’s used in cosmetics as a carrying ingredient and will work to carry Aloe Vera so that it can be absorbed into the skin.

Jojoba Oil is a premium oil used in aromatherapy and is used for dilutions of rare and expensive essential oils such as Rose and Jasmine, as it has no odour. It’s also packed full of Vitamin E and contains a substance called Oleic acid which is great for skin, you can read more about its benefits on the Jojoba oil site. As it’s also a non-greasy oil, it will leave a soft satiny feel to skin.

I use Rosewater in a lot of skin care, it’s so mild and gentle to use for the whole family, and is lovely drizzled over a fruit salad with some honey. You can read about some of its benefits in this Rosewater and Glycerine Toner recipe. Mostly, I love its floral fragrance.

Geranium Essential Oil has a floral fragrance similar to rose, its uplifting and keeps summer bugs away. I take a bottle of this with us when ever we go on holiday as it’s a much healthier alternative to commercial air fresheners. As it’s such a small bottle, it’s so easy to pack. Dispersed in a cup of water, it will freshen up any room, particularly useful in hotels that have had smoking guests stay.

It has antibacterial properties, balances skin that’s prone to acne and helps fade scars and marks. As it’s an all-rounder, I’m using it to help towards firmer looking skin.

Ylang Ylang Essential Oil, is one of my favourite fragrances, it’s heady and supposed to have aphrodisiac properties. A discovery whilst on honeymoon. For me this is bottled paradise and I’m always looking for ways to include it in skin care. It’s great to include in massage oils to revive and rejuvenate.

Lemon Essential Oil, another of my favourite fragrances. As Geranium and Ylang Ylang will make this body oil intensely floral, I have added this to balance out the fragrance of this body oil.

Vodka – for dispersing oil in water (it’s great as it’s odourless and natural, I like it in a cocktail too.)Jojoba and Aloe Vera Gel

The mix is simple, in a 100ml spray bottle add the following:

15 ml (1 tablespoon) Aloe Vera

15 ml (1 tablespoon) Rosewater

15 ml (1 tablespoon) Glycerine

30 ml (2 tablespoons) JoJoba Oil

15 ml Alcohol – plain vodka as this has no odour and will help disperse/mix oil with water

10 drops Geranium Essential Oil

10  drops Ylang Ylang Essential Oil

15 drops Lemon Essential Oil

Add the Jojoba oil into the bottle first, (I use a funnel to make this easier) and then add the Essential Oils, to blend together, (just swirl the bottle around), once blended, add Aloe Vera, I did this by putting in a small amount into the funnel and adding a small amount of Rosewater, until both were in the bottle then add the Glycerine.

Finally add the alcohol and put the mist spray top on and shake to combine all the ingredients.

The spray can be used immediately, to fully appreciate the fragrance, the scent from the essential oil will take about a week to fully develop. You can of course vary the essential oils to suit your own preferences.

Hmmm, there’s just one thing more, if you’d like to make this a completely indulgent experience, you might like to try the Lavender and Ylang Ylang bath soak before using this body spray.

If you enjoyed this post, please stop by often for more natural skincare and food ideas

Sunday Spa Feature – Honey and Vanilla Ultra moisturising Foaming bubble bath

honey and vanilla bubble bath (5)The last couple of weeks have been hectic. In the midst of moving the blog to self hosting, I’ve also decided that the windows in our bedroom will not last the winter without some restoration and repair.

Although our house does not have very high ceilings, I am not very tall, which means that I have been using a step-ladder to reach the top of the windows. My hands have been scrubbing, sanding and painting, and the rest of me is well and truly tired, I ache from leaning over and using muscles that are not used to all this hard work.

Yes, I admit it, I prefer being a couch potato, at home curled up on a sofa with a good book.  All this work has been physically demanding and I’m just not used to it.

At some point, if the room gets finished, I may share it, but before this happens, it will need a large dose of Marie Kondo’s Joy of Tidying Up before I’m able to do any kind of reveal.

So, all week, after each day of working on the windows, I’ve been  looking forward to a long soak in a bath-tub full of scented bubbles. In my bathroom are various tempting bubble baths, you know the kind that foams up so you can sink into soft fluffy clouds of bubbles.

However, I can’t help thinking that they are actually not going to do my skin much good, particularly my hands, which have now have a couple of blisters from holding a sander and paint brush,

I’ve a large jar of coconut oil in the cupboard, some orange blossom honey which I thought could be used as the main ingredients in a bath.

Both of these ingredients are great for skin and since I’m looking for ingredients that will calm and soothe, here’s the ingredients that made it into the foaming bath mix:Orange Blossom Honey, Castille Soap, Coconut Oil

Coconut oil is widely known for its ability to repair the skin barrier and reduce inflammation. You can read more about it’s amazing benefits in this article from Harper’s Bazaar.

Honey of course is high in natural antioxidants and is amazing for its healing properties.

Vanilla extract – this is an ingredient that I keep for cake making, after doing a bit of research, not only does it smell and taste yummy, turns out Vanilla is excellent for skin too!

It’s been used as a traditional remedy to heal burns, wounds and cuts – this is going to help heal my blisters! You can read more about its benefits in this article about Vanilla

I came across this recipe looking for things to make with the bottle of Doctor Bonner’s Castile Soap.

Apparently for lots and lots of fluffy bubbles, egg white added into a mix with oil and Castile Soap will make it bubbly.

(Guilty pleasure/confession – I had a double egg yolk fried egg for breakfast this morning as a result of using the egg white in the bath)

The ratios needed to make a frothy bath are as follows:

1/4 cup of coconut oil

1/8 cup of Orange Blossom Honey

1/4 cup of Castile Soap

1/2 egg white

1/2 tablespoon of Vanilla extract

This is the easy part, which is great as I’m tired – just mix all the ingredients together in a large jar and pour into a warm running bath. (Coconut oil stays solid at room temperature, to mix it into the Castile soap, I’ve heated it gently, in a jug of hot water, so it’s melted before adding to the honey and soap mix).

The bath is ready, a couple of scented candles have been lit and I am ready to wallow in the soft frothy bath.

hmmmm bliss!

Sunday Spa Feature – Rice and Lemon Skin tone brightening face mask

You can be gorgeous at thirty, charming at forty, and irresistible for the rest of your life.” Gabrielle Chanel

Rice Powder facemask with honey and lemon

Skin Brightening Rice Powder facemask with honey and lemon

My skin is what can only be described as mature, I am fortunate in that I have Chinese skin which doesn’t wrinkle so much, but the signs of age are starting to show. Since Chinese skin is more prone to pigmentation and age spots, I have always used a sunscreen and kept out of direct sunlight as much as possible.

Yesterday, though, in spite of all the sun protection, the little dark marks on my skin seemed more noticeable and there were a few more freckles which must have appeared while we were on holiday. Even though I have been using Clinique’s dark spot corrector and day cream, it looks as if my skin needs more help.

Whilst I like the idea of aging gracefully, with the signs of age acting as markers that define who you are, I think it’s equally important to do as much as possible to maintain healthy looking skin,

Thinking back to a time when I was at home with my mum, she would use rice in many of the beauty treatments she made at home. I think history must be repeating itself, my daughter calls me a hippie because of my enthusiasm for all things home made. I used to think the same of my mum.

So back to the ingredients for the skin tone brightening face mask – Rice is the staple food in Chinese cooking. It is also an ingredient that features in many beauty products. My mother used to keep the rice water (soaking the rice removes the starch to help improve the texture as it cooks), rather than throwing away the starchy water, she would save this and use it as a toner.

It contains PABA, (Para Aminobenzoic Acid) an ingredient you find in expensive skincare products, as well as ferulic acid, (an antioxidant), allantoin (anti-inflamatory) as well as vitamins C and E. In recent studies, it has been proven that rice and ricewater can improve and brighten skin. Some have even reported it can give skin a translucent glow.

As I want to use Rice in a facial, the best way to do this is a face mask using the rice in a powder form, so that all the goodness in the rice can soak into my skin.

I have simply put a small handful of Jasmine white rice into a hand blender pot and whizzed this until the rice has become a fine powder.

Once the powder is ready, add a teaspoon of honey, this is great for skin as well. I like to use this in masks because it will bind and hold the rice powder in place on my skin and act as a moisturiser.

I’ve included a very small amount of lemon juice and grated the skin of the lemon peel, both of which will also have a lightening effect on skin. But on their own, I think would be too harsh on mature skin, so just a teaspoon of lemon juice.

I’ve included some rosewater to make the paste the right consistency (You can add more if the paste is too thick),

Spread the facemask on your face and leave for 15-20 minutes. I love using a face mask on a Sunday morning soaking in a bath whilst the kids are still asleep – there’s just enough me time before the house awakes.

Once you’ve finished with the facemask, wipe away with a warm towel and follow with a facial toner and moisturiser as usual. There’s just one last thing, if you’d like to make your own  Rosewater cleanser and toner in one, click on the link for the recipe.

Sunday Spa Feature – Hot Oil hair treatment for dark hair and healthy scalp

Hot Oil Treatment for healthy hair and scalp

Lately my hair feels like straw. I think it must be the combination of feeling under the weather and the chlorine in the swimming pool on holiday.

In my teenage years, I came across VO5 hot oil treatment and would use this on my hair every Sunday as I was convinced by the marketing that it was necessary for long hair.

With all the natural ingredients I have in my cupboard however, it would be simple to make up a batch of hot oil treatment for my hair, without the hassle of having to go shopping.

To condition and put moisture back into my hair, I have chosen to use Extra Virgin Olive Oil, well-known for its health benefits, full of antioxidants. It is also a great hair restorer, it contains vitamins A and E and works to treat damaged hair and promotes a healthier scalp.

Since I also have fresh Rosemary growing in the garden, I have taken a sprig of this herb to use with the Olive Oil. Rosemary tea and Oil is widely used in hair treatments and is known as a traditional treatment to darken hair and slow the appearance of grey hair. Since I now have a sprinkling of white showing through my black Chinese hair, this will be great to slow down the rate at which my hair is going grey. The herb is also great at regulating and re-balancing dry itchy scalps.Rosemary and Sage (1)

One of the most used essential oils I have is Tea Tree, this essential oil has fended off the dreaded head lice that most school kids come home with. Whenever, I receive a note from our kids schools advising of Head Lice, I make sure to add tea tree oil when my kids are washing their hair. In fact they now don’t need reminding to add a few drops into their shampoo.

The oil helps unclog pores that may be blocked due to use of shampoos and hair products that contain fillers and polymers. It’s also great at getting rid of dead skin cells, to help healthy new hair to grow.

Fresh Rosemary and Sage herbs to use in hot oil treatmentFinally, as I have fresh Sage growing in the garden also, I will combine this along with the fresh Rosemary and use it as a herb infusion in the olive oil. It is also known as a herb that helps to darken hair.

Making the hot hair treatment is very simple.

In a pan, gently heat two tablespoons of extra virgin olive oil.

Gently bruise the fresh rosemary and fresh sage with a pestle and mortar and add to the hot olive oil, leave to steep for as long as possible (overnight is preferable) but if you are stuck for time, you can use immediately.

I have simply heated the herbs through in the olive oil, then left to cool until it is comfortable to touch with my finger.

With the oil warmed through (be careful that it is not so hot that it will scald – you should be able to put your finger in the oil without it feeling uncomfortable to touch.)

Add 2-3 drops of tea tree essential oil.

If you also have Rosemary essential oil – 2-3 drops can also be added to the hot oil to give the properties of Rosemary an extra boost.

To apply the hot oil

In a bowl, using fingers massage the warm oil into your scalp in circular motion, until all your scalp has been massaged thoroughly, add the remaining oil and run through the entire length of your hair. (1 – 2 tablespoons should be plenty to cover shoulder length hair).

If you have a disposable shower cap, cover your hair and wrap in a towel so that the warm oil can penetrate your hair.

Leave for as long as possible.

Wash with your usual shampoo and condition as necessary.

Once dried, my hair, which felt dry and brittle, has regained some of its bounciness and shine.

Hmm definitely will need to do this on a regular basis.

If you have lighter coloured hair and want to try this hot oil treatment, try Calendula,  chamomile and lemon peel added to the olive oil, as I’ve read these herbs will help to lighten and add highlights to hair.

Home Made Cuticle Oil

Sweet Almond Oil for home made Cuticle Oil

This week, I took the opportunity of doing some gardening with my kids and planted some lovely herbs. The combination of this and the broken dishwasher has meant my hands have taken a battering.

Since I have all the ingredients to make a home-made Cuticle Oil, I thought I would share this with readers of this blog.

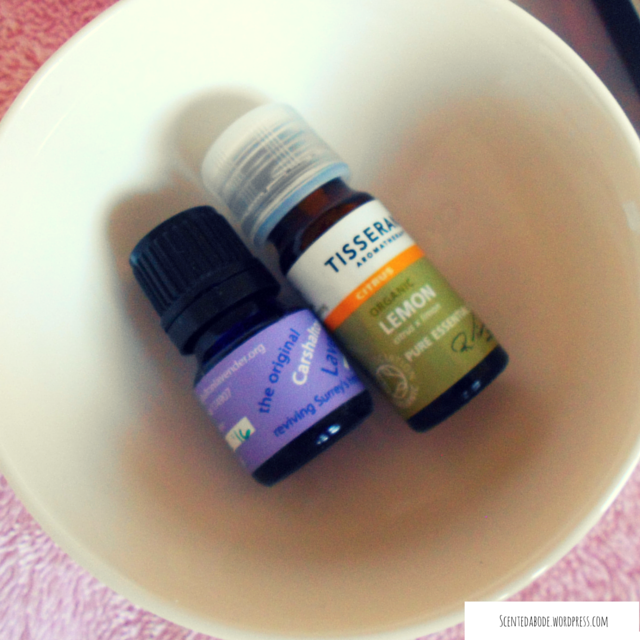
Lavender and Lemon Essential OilIt’s so simple that it really requires very little effort and saves a great deal since I no longer purchase commercial cuticle creams or oils to condition my nails.

If you have some Sweet Almond Oil* or Olive Oil, these can be used as the base, both are perfect oils for conditioning and softening nails. Other oils to try are Coconut, Grape Seed, Jojoba oils.
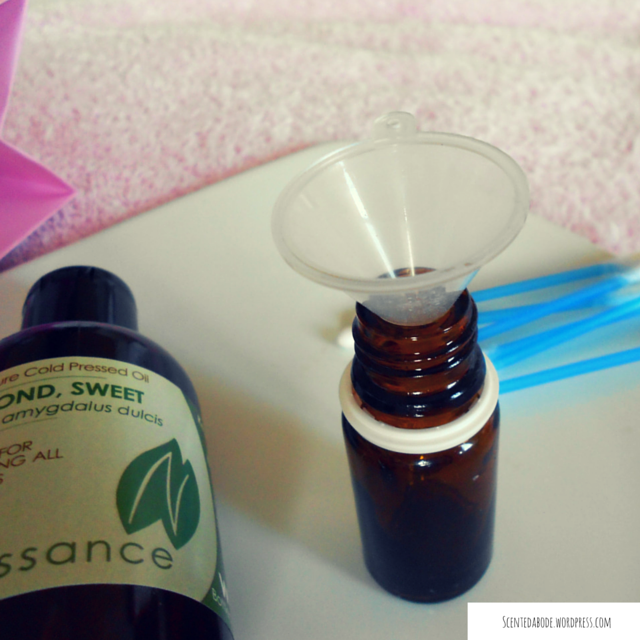
The oils will nourish, add moisture and soften the cuticles.

I’ve used an empty essential oil bottle which I’ve washed out – but really you don’t need to do this if you are pressed for time as the one I’m using contained Tea Tree Oil,  any residue in the bottle will simply mix with the carrier oil.

Into this 10ml bottle, I have added just one drop of Lavender Essential Oil, along with Lemon Essential Oil. Sweet Almond Oil for making Cuticle Oil

Both the essential oils have been chosen for their cleansing, rejuvenating and healing properties. (Lemon is also antibacterial, used along with Tea Tree Oil, will combat against the threat of any infections.)

Mixed thoroughly, I have then applied this mixture using a cotton wool bud all over my nails covering the cuticles as well.

Left on overnight, my nails and cuticles feel stronger and the rough cuticles have been smoothed out. I didn’t even need to use a cuticle stick to push them back which I normally resort to.

Simple!


*If you would like to order the Sweet Almond Oil in the UK, the link will take you through to the product page on Amazon.

*If you would like to order the Sweet Almond Oil in  the US, the link will take you through to the product page on Amazon.

*These are affiliate links, which if you order through, a small commission is earned. Thanks in advance for using the links – any money earned will go towards maintaining the blog.

Home made Rosewater, Witch Hazel & Glycerine Cleanser vs Micellar Water

Rosewater & Glycerine Cleaner vs Micellar Water

I ran out of my favourite brand of Rosewater recently and since Edgware Road is no longer on my way home, I did not want to go out of my just to get a bottle of Rosewater.

I found the Cortas brand of Rosewater in a local store selling Middle Eastern, Continental and English food, on my way home,  you might have read about this in an earlier Post about a bowlful of Cherries, I also purchased a lovely bottle of Orange Blossom Water along with the cherries at the same time.

The bottle, although not as pretty as my previous brand, said Cortas was established in 1930. It wasn’t very expensive, so I thought I would try it out.

After some research, I found out that there are several types of Rosewater, the ones that include other ingredients and use Rose Oil, are used for skincare only and may often include artificial scent and preservatives.

The Cortas Rosewater lable had little information about what it was made of or how it was made but after a bit of digging, I found out that it is all natrual, and food grade, it is made from distilled Rose Petals with no additives. It has a lovely sweet Rose Scent, a little tangy compared to my last bottle of Rosewater. It comes from the Lebanon and is a very popular brand stocked by many Middle Eastern stores.

Since I am running low on Micellar water, it occurred to me that the home made Rosewater and Glycerine toner, I’ve been using was pretty good at removing make-up on the occasions I had managed to leave some on my skin after washing my face with a liquid facial soap.

Before getting some more Micellar water make up remover (I use it when I’m in a rush or need a quick freshen up) I thought I’d try making up a batch of a cleanser using Rosewater, Glycerine and Witch Hazel.

Micellar Water is made up of special molecules within the liquid that act like tiny sponges, absorbing any dirt or make-up, grabbing it off the skin and depositing it on the cotton wool pad that the water has been soaked in. There are many brands, some that promise not just the benefits of cleansing, but lots of other claims besides.

I thought that the properties of Glycerine were pretty similar, it’s a humectant, attracting and retaining moisture, it been used widely as an ingredient for skin cleansers. So after a few mixes and experiments, I got to what I thought was the right consistency for the cleanser (too much glycerin and it became too sticky and made my skin feel shiny, too little and it did not clean as well as the Micellar Water).

Glycerin, Rosewater, Witch HazelThe final mixture that is almost like the Micellar Water, a gentle liquid, great at cleansing the skin and leaving no sticky residue. It consisted of the following combination:

5 parts Rosewater

2 parts Witch Hazel

1 part GlycerineRosewater, Witchazel and Glycerine cleanser vs Commercial Micellar Water

The ingredients were simply put into a bottle and shaken to mix thoroughly.

To see if it would work as well the Micellar Water, my experiment involved a comparison test. I used the Rosewater cleanser to cleanse my face on one side, the other side with the Micellar Water.

I’ve been using the home-made cleanser for 2 weeks and my skin feels softer. Since both Rosewater and Witch Hazel have natural astringent properties, I’ve noticed that not only does my skin feel softer, my pores are much smaller too.

The fragrance and liquid are instantly refreshing. I like the fact that I’ve made it, I much prefer to know what ingredients I’m using and in what quantities. As there’s no preservatives, the ingredients are all natural with zero commercial chemicals or preservatives. It also means it’s more likely to be better for my skin.

I think this home-made version works just as well as the commercially made Micellar Water, best of all it smells heavenly, like taking a walk through a Rose Garden, hmmm,  I’m off to go and clean my face.