Handmade Christmas Gifts – Peppermint and Cedarwood Foot Salve


Every year, I look for gifts to give friends and family that are unique, thoughtful and show that their tastes or what they like have been considered and reflected in the gift.

On most occasions, their gifts to me have out done me in every respect, so this year to show my appreciation, the gifts I’ve made are uniquely personalised. Even better, I’ve not spent any time walking around shops trying to find something special, because the ingredients are already in the cuboard ready to be made into something special and take very little time or effort to prepare and make.

If you have ever tried the Shea Butter Hand and foot cream from L’Occitane or from Burt’s Bees, these are lovely little gifts to give and receive. The only thing is that there’s a possibility that someone else has had the same idea and purchased the very same. They smell wonderful, with a range of delicate scents and I must admit are lovely gifts to receive.

To make these Foot and hand Salves is very simple, easier than baking a cake in fact. All you need to do is measure out the ingredients, gently melt them in a jug in a pan of simmering water, add the essential oils and once melted, pour into your chosen containers. Personalising the scents makes these gifts unique, especially if you know what scents they enjoy the most.

Ingredients for the footsalve:

1 tablespoons of Argan Oil

2 tablespoons of Coconut Oil

1 tablespoon beeswax

4 tablespoons of unrefined Shea Butter

1/4 tsb of essential oils – a combination of Peppermint and Cedarwood (for the boys) or Peppermint and Lavender (for the girls)

To make the Hand Salve variant, you can change the oil and use Jojoba or Rosehip Oil, whichever you think their hands (or your own) will appreciate the most and add your choice of essential oils to add scent. Beeswax and the Shea Butter will emulsify and give the salve it’s lovely thick creamy texture.

Better still, if you want to make the Handsalve to treat age spots (after all, most beauty mags will tell you it’s your hands that show the first signs of aging) select the essential oils for their skin therapeutic benefits.

That’s it. All there is to it for making scented rich moisturising salves. Perfect as a gift or an indulgent luxurious treat. Hmm I think I’m going to find a bit of me time for a Manicure and try some of the handsalve I made.


Sunday Spa Feature – Orange, Cinnamon and Ginger Cellulite Smoothing Skin Polish

Orange, Ginger and Cinnamon cellulite smoothing skin polish (2)

I’ve been baking with Oranges and Cinnamon this week and the delicious scent gave me an idea for a cellulite smoothing skin polish which is easy to make at home, packed with ingredients that will help firm, tone and smooth skin which might be looking a little bumpy because of cellulite.

Whilst there are many commercial products available, most health and skincare experts would agree that a healthy diet, combined with exercise to stimulate the circulation will help eliminate toxins from your system and therefore improve skin and muscle tone.

Now, I’m not what you call a gym bunny, so to help improve skin circulation, I’ve created a cellulite smoothing skin polish that can be used once or twice a week as part of a spa experience.

The Ingredients that made it into this Cellulite Smoothing Skin Polish:


Dried orange peelOrange Peel

Orange Peel has excellent antioxidant property, containing Vitamin C an antioxidant found in many expensive skin care products, it also contains Calcium, Potassium, Magnesium, minerals which is great for skin. The citric acid in the orange peel that will help to exfoliate and brighten skin.

Root Ginger

Contains powerful antiseptic and cleansing properties, it increases blood circulation. With the heat from the Ginger grated into the skin polish it will gently warm and stimulate circulation to the skin.

Cinnamon

Cinnamon has been used in Asian and Chinese cultures both in food and herbal remedies for centuries.  Cinnamon will boost circulation when applied to the skin and has been shown in recent studies to rid the body of toxins and boost the immune system.

Coconut Oil

Known in it’s ability to moisturise, it’s packed full of antioxidants which work to increase skin elasticity and firmness.

Argan Oil

Rich with Vitamin A and E, Argan Oil is mainly composed of fatty acids (80%) and antioxidants such as linoleic acid. It will smooth, add moisture and rejuvenate skin, no wonder skin care and cosmetic companies have been using this in many of their products.

Dead Sea Salt

The waters of the dead sea are renowned for their therapeutic benefits. Containing lots of minerals such as Magnesium, potassium, calcium chloride and bromides, it increases circulation and helps skin to retain moisture. It has been proven to be effective for easing muscle aches and pains. As the grains of this salt are fine, it can be used as the basis of the skin scrub.

If you don’t have Sea Salt to hand, then soft brown sugar can be used as an alternative.

How to make:

This is so simple to make, as Coconut oil is solid at room temperature, I have put a tablespoon of the coconut oil in a glass jar and in a jug of hot water to melt.

Once melted, combine the Orange Peel powder with the Coconut oil. (I have dried the orange peel first before putting it into a food blender and then blitzing it so it becomes a fine pebbly mixture which will mix better with the oils.) If you don’t have the time to do this, simply grate the orange peel.

Add one teaspoon of ground cinnamon. You can either use the pre-ground powder or grate some cinnamon sticks if you have this.

Grate some fresh root ginger, about a teaspoon or more if you are feeling brave as the heat of the ginger will be very stimulating.

Combine all these ingredients and make into a paste. Add 5-6 tablespoons of Dead Sea Salt and mix together so that the paste of coconut oil, orange peel, grated ginger and ground cinnamon is mixed thoroughly into the dead sea salt.

At this point the mixture will be a little dry and crumbly. Add a teaspoon or two of Argan Oil so that the mixture is soft to the touch but remaining granular for the scrub mix.

You can either use this scrub in the bath, or in the shower, apply a little at a time, rubbing and massaging the mixture in small circular motion into your skin.

You’ll notice not only does it smell great as the scent of oranges, ginger and cinnamon is released into the warmth of a shower or bath, but your skin will get a little pink and and you may tingle all over*, this is from the heat of the spices boosting your circulation and improving lymphatic drainage. The granular salt works to polish and improve the appearance of any cellulite, lumps, bumps and skin blemishes.

The mix can also be used as a bath soak. Just sprinkle into warm running water. It is particularly great for sore aching muscles or as a treatment for the symptoms of a cold or flu.

Once you’ve finished in the bath or shower, if you want to go all out and complete the spa experience, why not try making and using the pampering body oil to lock in moisture to your skin.

*Before trying this recipe, please do a patch test first in case of any skin irritation.


Sunday Spa Feature – Honey and Vanilla Ultra moisturising Foaming bubble bath

honey and vanilla bubble bath (5)The last couple of weeks have been hectic. In the midst of moving the blog to self hosting, I’ve also decided that the windows in our bedroom will not last the winter without some restoration and repair.

Although our house does not have very high ceilings, I am not very tall, which means that I have been using a step-ladder to reach the top of the windows. My hands have been scrubbing, sanding and painting, and the rest of me is well and truly tired, I ache from leaning over and using muscles that are not used to all this hard work.

Yes, I admit it, I prefer being a couch potato, at home curled up on a sofa with a good book.  All this work has been physically demanding and I’m just not used to it.

At some point, if the room gets finished, I may share it, but before this happens, it will need a large dose of Marie Kondo’s Joy of Tidying Up before I’m able to do any kind of reveal.

So, all week, after each day of working on the windows, I’ve been  looking forward to a long soak in a bath-tub full of scented bubbles. In my bathroom are various tempting bubble baths, you know the kind that foams up so you can sink into soft fluffy clouds of bubbles.

However, I can’t help thinking that they are actually not going to do my skin much good, particularly my hands, which have now have a couple of blisters from holding a sander and paint brush,

I’ve a large jar of coconut oil in the cupboard, some orange blossom honey which I thought could be used as the main ingredients in a bath.

Both of these ingredients are great for skin and since I’m looking for ingredients that will calm and soothe, here’s the ingredients that made it into the foaming bath mix:Orange Blossom Honey, Castille Soap, Coconut Oil

Coconut oil is widely known for its ability to repair the skin barrier and reduce inflammation. You can read more about it’s amazing benefits in this article from Harper’s Bazaar.

Honey of course is high in natural antioxidants and is amazing for its healing properties.

Vanilla extract – this is an ingredient that I keep for cake making, after doing a bit of research, not only does it smell and taste yummy, turns out Vanilla is excellent for skin too!

It’s been used as a traditional remedy to heal burns, wounds and cuts – this is going to help heal my blisters! You can read more about its benefits in this article about Vanilla

I came across this recipe looking for things to make with the bottle of Doctor Bonner’s Castile Soap.

Apparently for lots and lots of fluffy bubbles, egg white added into a mix with oil and Castile Soap will make it bubbly.

(Guilty pleasure/confession – I had a double egg yolk fried egg for breakfast this morning as a result of using the egg white in the bath)

The ratios needed to make a frothy bath are as follows:

1/4 cup of coconut oil

1/8 cup of Orange Blossom Honey

1/4 cup of Castile Soap

1/2 egg white

1/2 tablespoon of Vanilla extract

This is the easy part, which is great as I’m tired – just mix all the ingredients together in a large jar and pour into a warm running bath. (Coconut oil stays solid at room temperature, to mix it into the Castile soap, I’ve heated it gently, in a jug of hot water, so it’s melted before adding to the honey and soap mix).

The bath is ready, a couple of scented candles have been lit and I am ready to wallow in the soft frothy bath.

hmmmm bliss!

Sunday Spa feature – A luscious lip remedy

LEMON BALM lip salve

Luscious Lemon Balm and Honey Lip Salve

We recently brought home some lemon balm to plant in our garden. Since this is a herb that is new to me, I looked up all the things you can do with it for natural skin care as well as in food.

It works great as an alternative to mint added to Iced Tea, and as a herb to add into salads, it is a great herb with medicinal properties that include helping to calm down anxiety and sleeplessness and as an aid for digestive health.

I’ve also read that it is a great herbal remedy for cold sores, which gave me an idea to find a way to incorporate it into a lip salve.

To get the herb into the lip salve, I created an oil infusion, so that the goodness of the lemon balm can be transferred into the carrier oil. It is simple to make and the process of infusing oils with different herbs and flavours can be used for other purposes – such as creating a lovely lemon oil to use in salads. I picked a small amount of the leaves of the lemon balm, which I then bruised in a pestle and mortar so that all the goodness of the plant can be transferred into the carrier oil.

To keep things simple, I’ve used Sweet Almond Oil as it’s a good carrier oil for aromatherapy massage therapies.  As I have no patience (if you want you can use dried herbs and leave in the oil to infuse over 4-6 weeks, leaving the mixture in a dark place)  to speed up the process for the infusion, I have gently heated the oil with the lemon balm and transferred this into a clean jam jar and left it to sit on the windowsill for a few days.

Once the colour of the oil has taken the colour from the leaves, the oil is ready to be used.

For the lip salve recipe, I’ve used the following combination:

Ingredients:

1 tablespoon of beeswax

1 tablespoon Lemon Balm infused oil

1 tablespoon of Coconut Oil (organic cold pressed)

2 teaspoon of honey

4 drops lemon essential oil, 4 drop Peppermint essential Oil

The amounts above makes 60ml of lip salve mixture, which would fit into 2 x 30 ml pots shown in the picture.

Making the lip salve is very easy. In a simmering pan of water, put a glass jug into the water, add the beeswax and wait for this to melt. I use the beeswax pellets as this is much easier to use than the large blocks of beeswax.

Beeswax melting with sweet almond oil and coconut oil

Beeswax melting with sweet almond oil and coconut oil

Add the lemon balm infused oil along with the coconut oil and wait until this is all melted into the beeswax.

Add the honey and take the mixture off the heat.

Add the essential oils (I’ve chosen Lemon and Mitcham Peppermint essential oils to intensify the scent of the lip salve).

Pour into the pots of your choice and wait for the mixture to solidify before use.

As the lip salve is made with natural ingredients, I am keeping the quantities made up small so that it can be used straight away. It should keep for around 4-6 weeks, and is a great way to keep lips soft.

For a beauty ritual that helps to maintain the condition of your lips, gently exfoliate lips to remove any dry or flaky skin (I use a toothbrush with soft bristles to do this, but you can also try using a muslin cloth) before applying the lipsalve at night before bedtime.

Hand made Calamine & Coconut After Sun lotion to the rescue

Home Made After Sun Lotion

Home Made After Sun Lotion

It is nearly the end of term and with it the annual tradition of the School sports day. This year, my eldest had opted out of taking part. (Apparently it’s optional at her school) Instead she watched the event with some of her friends.

When I returned home that evening, both she and my husband were glowing bright red from where they had been sitting in the sun.

When they were much younger, I would run around after both of my kids with a bottle of sun-lotion, smearing them from head to foot to keep their delicate skins protected from the sun.

Unfortunately, I was at work when they caught the sun.

In previous years, my go to remedy for sun stressed skin is Calamine lotion or cream from the pharmacy. The pink liquid is by far the fastest way of cooling down hot skin. It is also good for sensitive skins, the zinc in the lotion reduces any rash faster than anything else I’ve tried.

My daughter now considers herself to be way too cool to be using a lotion that she thinks is for kiddies. She turned her nose up at it declaring “it stinks”. I must admit it’s got quite a chalky medical aroma to it.

This is an argument that I’m unlikely to win.

I have therefore created a lotion that still has the cooling properties of the calamine, but, with all natural healing properties that will look and smell great.

So here’s how I made it:

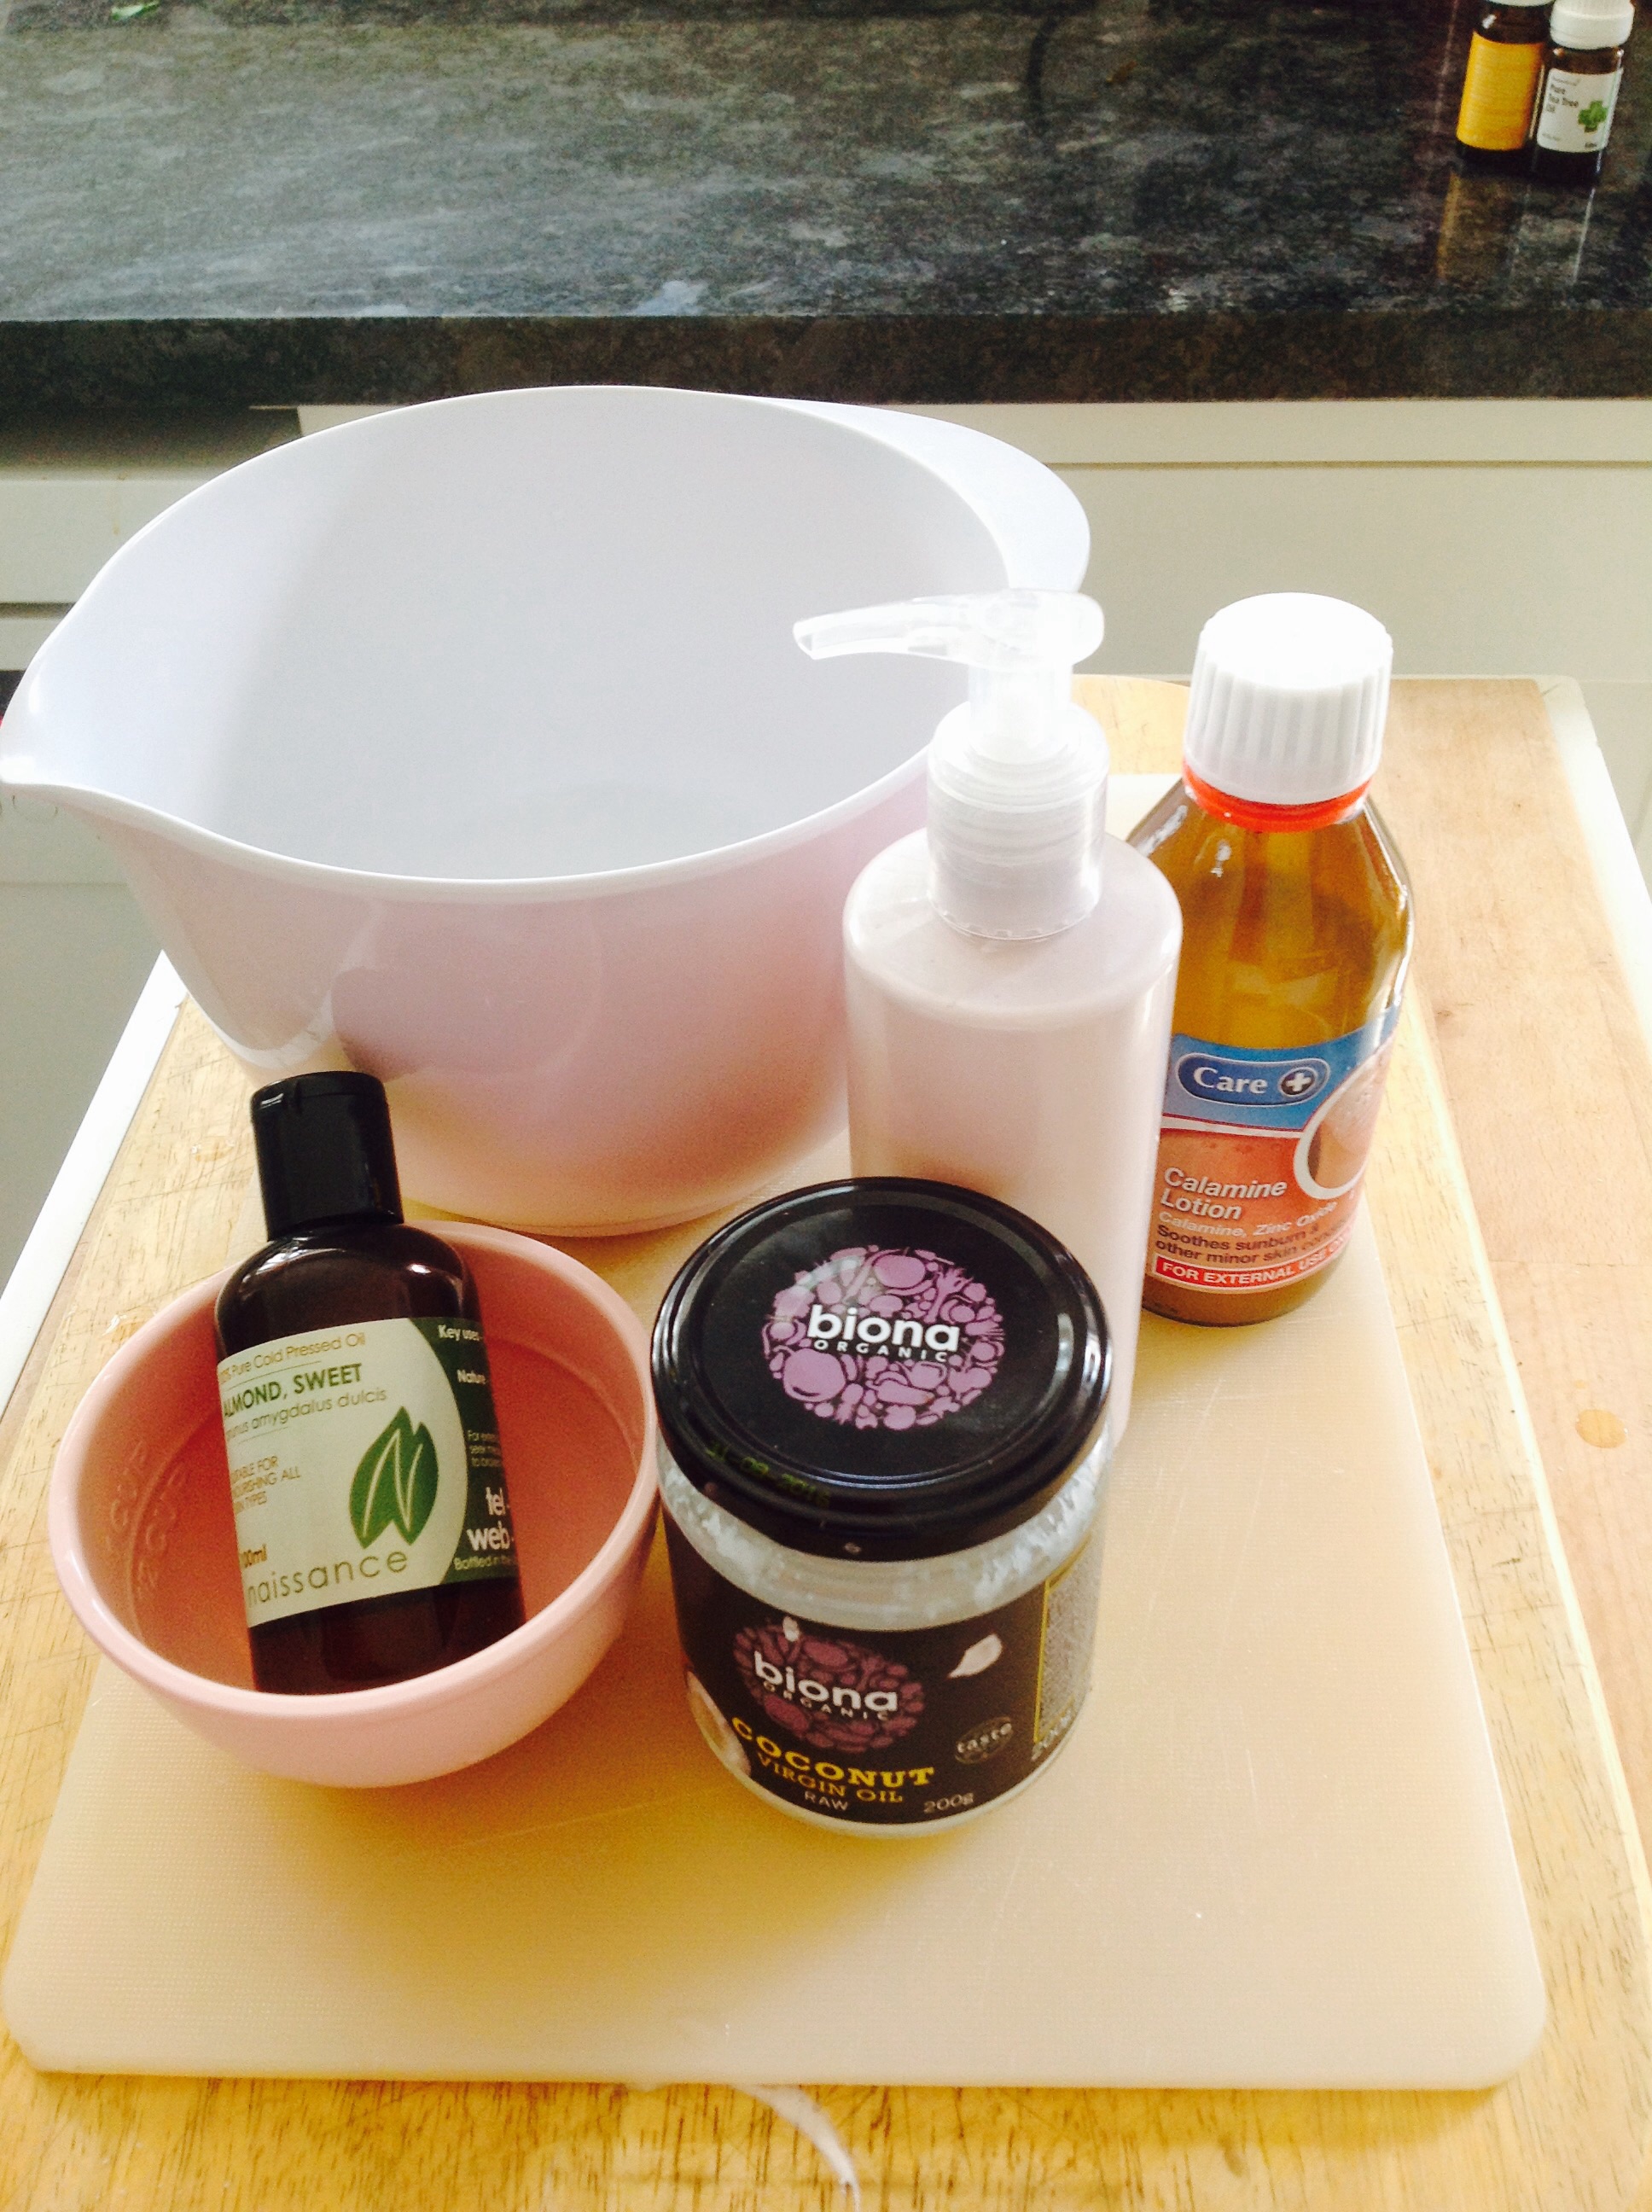
6 Tablespoons of Calamine lotion (the type you get from the Pharmacy)

4 Tablespoons of Cold Pressed Organic Coconut Oil

2 Tablespoons of Sweet Almond Oil

1 teaspoon of Stearic Acid (orderd online from natural Heath & Beauty store)

Home Made After Sun Lotion

Ingredients for Home Made After Sun Lotion

For the scent, I added the following essential oils: 7 Drops of Lavender essential oil (Great healing and skin soothing properties) 5 drops of Lemon essential oil (good antiviral and antiseptic properties and a refreshing scent), 1 drop of Citronella (just one drop, as it can overpower everything else, it’s a good bug repellent during the summer months).

As this was the first time I made this lotion, I tried out a very small amount first to see if it would work.

The Calamine lotion is water based, mixing it with the oils would need something to bind them together to stop them from separating.

I used Stearic Acid as this is a natural ingredient and works to act as an emulsifier, I simply added this to the mix in quarter teaspoon amounts.

This meant it was easier to whisk into a creamy consistency, switching to Sweet Almond Oil once I’d gotten to the bottom of the jar of Coconut oil.

I continued to alternate between the Calamine and the oils, adding the stearic acid whenever I felt the mix started to look too thin. I kept going until It was the consistency of a soft cake batter, in a pretty pink colour.

Essential oils were added at the end,  which was whisked into the mix.

As there are no chemical preservatives, I’ve kept the quantity small, enough to last a couple of weeks for the whole family to use.

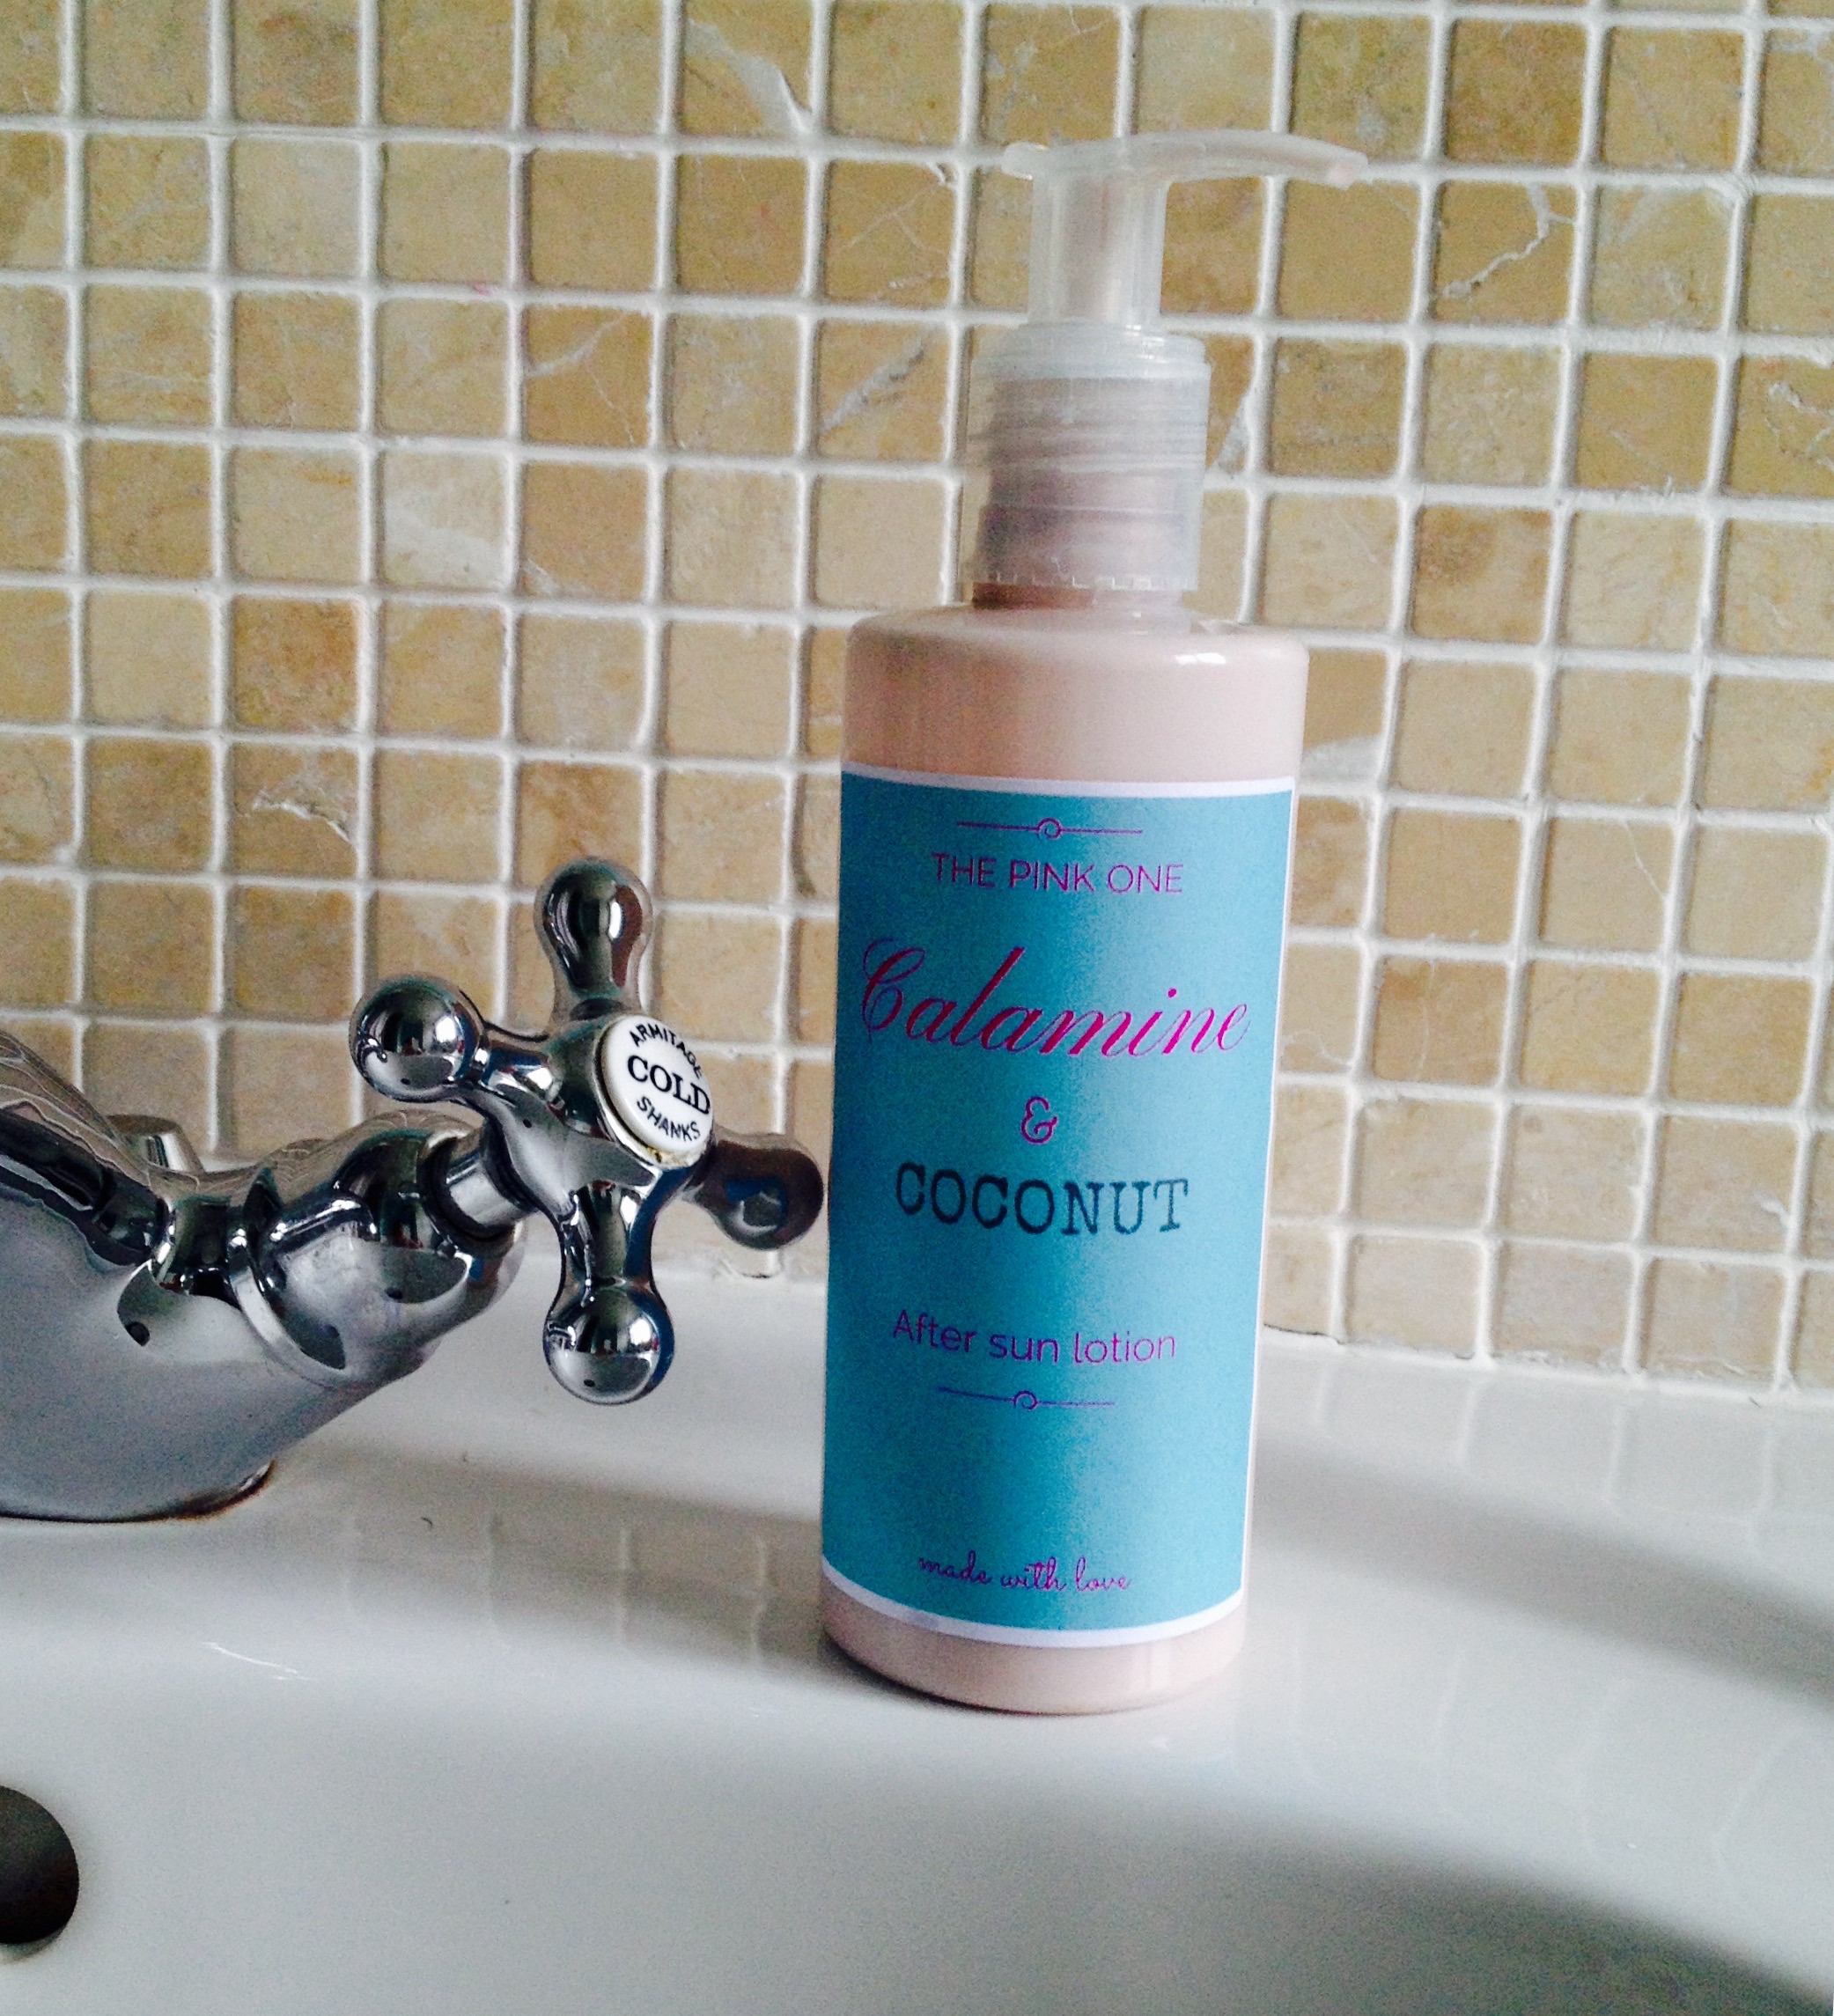
The mix was poured into an empty clean recycled bottle that used to contain a hand wash. I designed and added a lable and some clear vinyl to make the label waterproof.

I think the finished result wouldn’t look out of place in a beauty store. My husband was first to try the lotion, no adverse reaction from my Hub, no adverse reaction from me or from my kids.

The texture and smell is a lot better than the original lotion.

Do let me know if you’ve made your own  sun lotion, or can recommend one to try.