Summer Heat Proof Make-up Tips
Although this post is not particularly about scent, I feel it might be helpful now that we are in high summer, to share 10 beauty tips I’ve learned over the years.
The company that I work for decided to throw a summer party this year in celebration of it’s 150th year anniversary, it also happened to be on my birthday.
While everything was being prepared, what we hadn’t accounted for, was that the date scheduled for the party happened to be the hottest day of the year.
Since I was determined to enjoy myself without having to worry about makeup sliding off my face, I applied every tactic I’ve learnt to keep my make-up intact and ready for the party.
Some years ago, I had a number of make-up lessons for my wedding from various make-up artists from various brands. What I learnt about wedding make-up was that it needed to be flawless, fade resistant and take you from day into evening with the minimum of touch-ups.
Here’s the 10 tips I’ve learned for stay-put make up:
1) A good Oil Free Moisturiser: Before applying make-up, and after you have cleaned, toned your face, the moisturiser should be oil free and best quality you can afford as this would protect and act as the base for any primer and foundation.
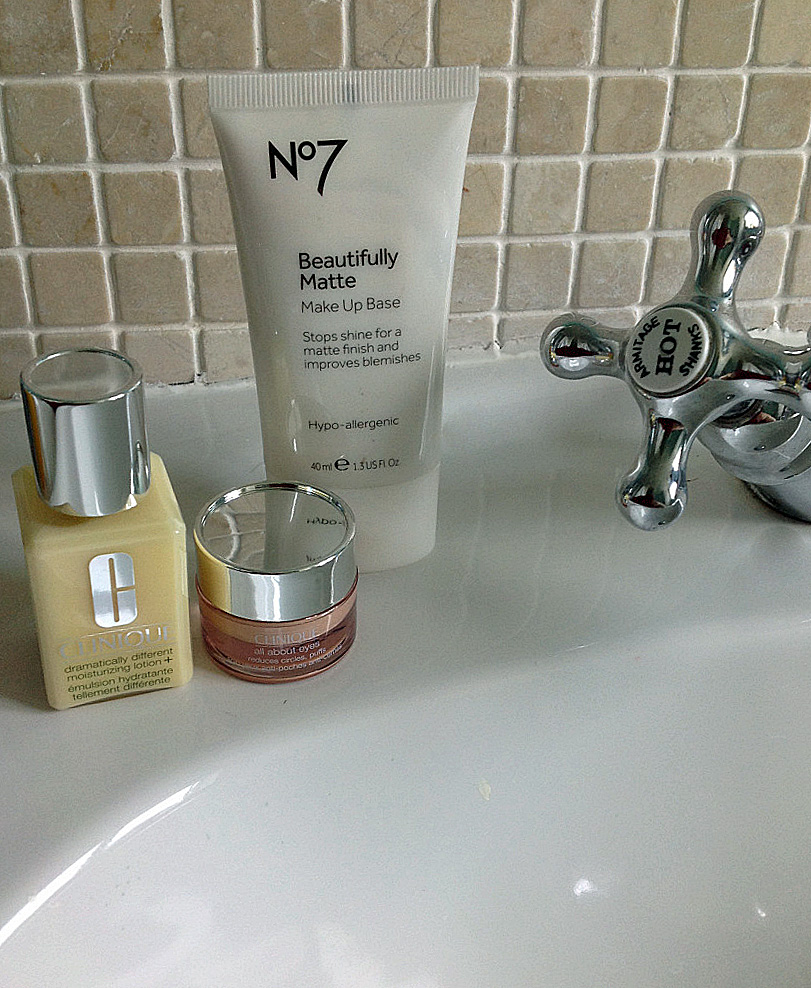
No7 Beautifully Matt Make Up Base
Chanel’s Makeup artist’s tip on applying makeup was to let the moisturiser sink into the skin before applying a primer or base.
2) Mattifying primer/base: To maintain a shine free complexion, apply a mattifying base over the t-zone area or whole face. The one I have discovered recently which works very well at keeping my face shine free is from Boots No7 Beautifully Matte Make-up Base.
3) Oil Free Foundation with high SPF: Leave the primer to settle for just a little while before applying any foundation. The one that I am currently using is the CC Cream from Clinique as the oil free formula, combined with the SPF30 is a great way to have coverage whilst keeping everything looking natural during the day. As soon as I finish this however, I am going to try the Chanel Vitalumière Acqua that I discovered on Ravishing Roses’ blog here. and use it along with Clinique’s oil free Super City Block SPF 40 that I use alone at the weekends.
4) Concealer for eyes: Apply a primer over the eyelid area, this will prevent eyeshadow from creasing and blur any wrinkles. I always use a base for my eyes – Clinique’s All About Eyes concealer, which I find works great as a concealer and primer in one.
5) Set with Powder: Applying a light dusting of powder will set and help make-up last longer in heat and humidity – the one I’m using is Clinique’s Blended Face Powder, Transparency 3.
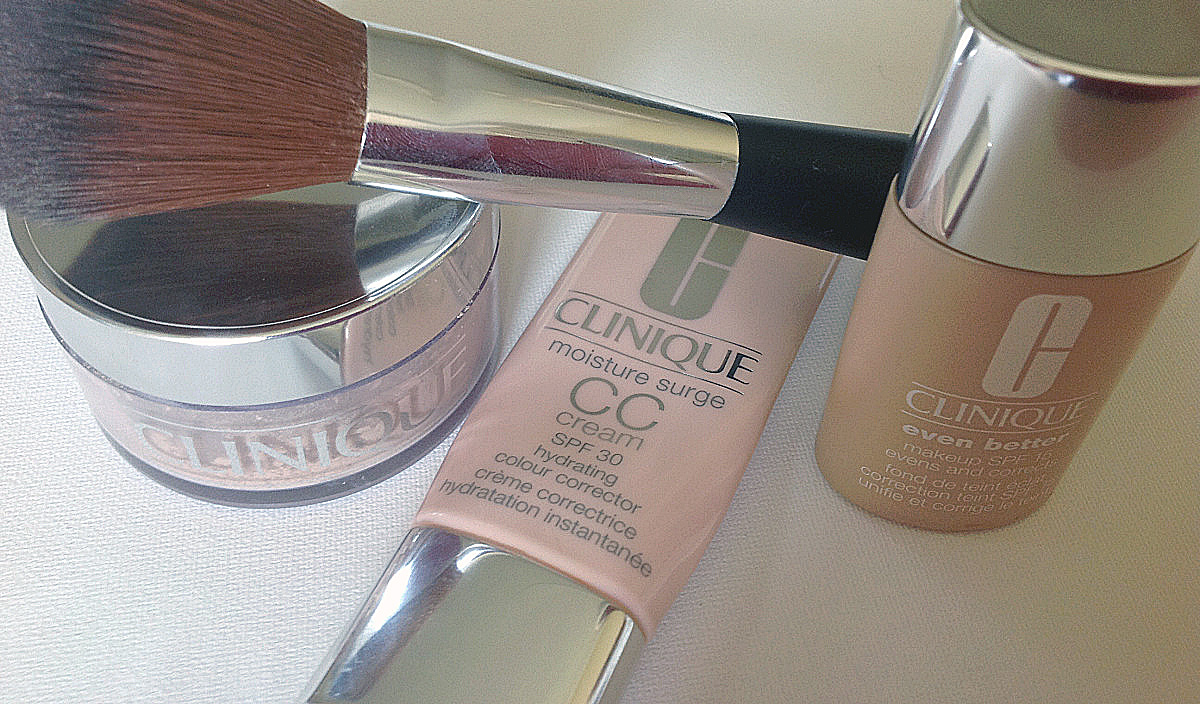
Clinique Face Powder, CC Cream & Foundation
Over the years I have tried many face powders, but this one is the one I keep returning to. It is mineral based and natural looking, you forget that you’re wearing it and is also long lasting.
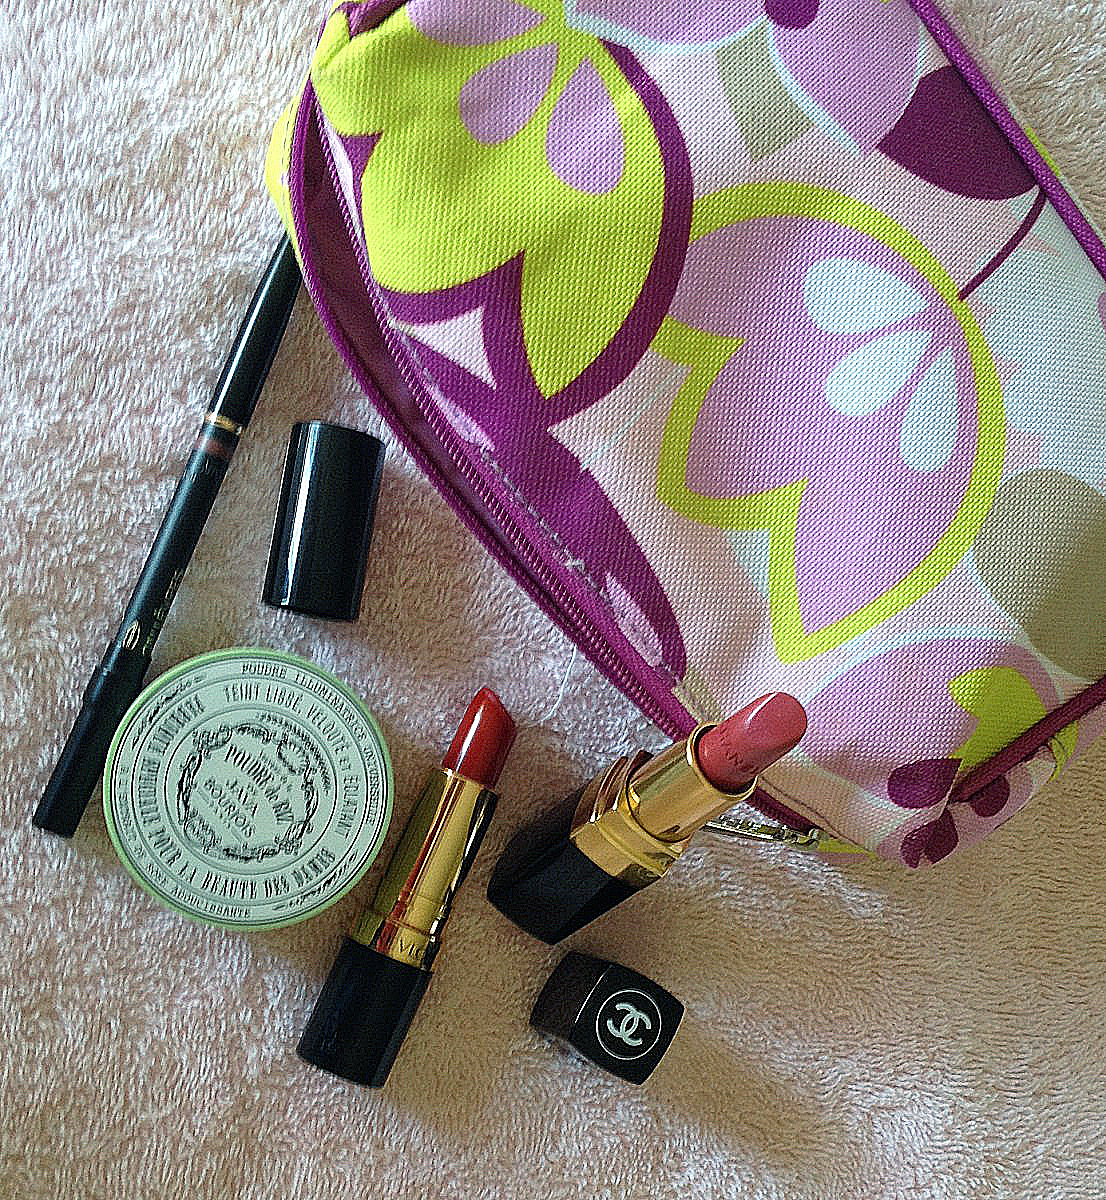
6) Use good quality products for eyes: The tip from my make up lesson from Chanel was to use a tiny bit of water to mix in with the eyeshadow to create a more intense look, it will also last longer. You can use it even as an eye liner, with the darkest shade in the eye shadow palette.To line the eyes, I used Bourjois Khol and Contour eye pencil in a dark grey, I find this is a good quality pencil and easy to blend. I took the Bourjois Smoky eye trio in Gris Party a very dark instense grey pallet to use for the party.
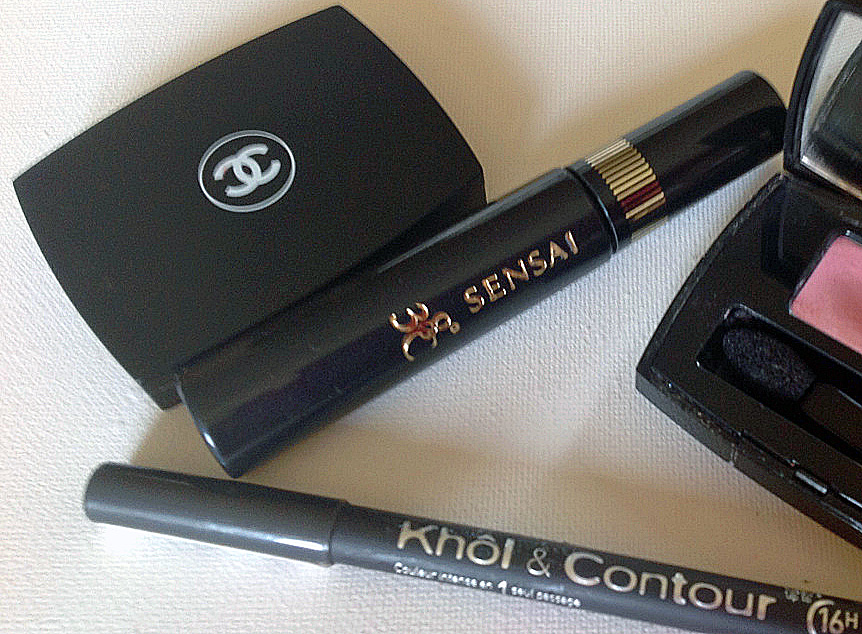
Kanebo Sensai 38°C Mascara
7) Smudge free mascara: To compete the eye make-up, the mascara that I use is Kanebo Sensai 38°C in black, this stays put in any heat. As it is smudge proof and suitable for contact wearers, it’s helped me avoid the dreaded panda eyes. Best of all it only comes off with warm water that is over 38 degrees. I have been known to bulk buy this so that I do not run out. You can now order this online through Harrods website. I have also discovered that Clinique has a similar product called Lash Power Mascara Long Wearing Formula which I’ve not tried yet so can’t tell you if it stays put as well as Kanebo’s.
8) Lip line the whole of your lips: The final tip from the make-up artists, was to use a lip-liner, a natural shade close to your own lip colour and fill in the entire lip, that way you don’t get the circle of colour around the mouth.
9) Long lasting lipstick: My all time favourite lipstick is Chanel’s Rogue Coco in Légende which has a slightly blue tone and is a perfect match to my lip colour, it adds a slight iridescence and I love the subtle scent of rose.
It tends to last and last so I never really have to remember to re-apply more than one or two times in a day. Although it’s pricey, I find it lasts 2-3 times longer than budget brands and that means for me, better value and a little bit of luxury that makes me smile.
For the evening, I chose Revlon’s Super lustrous lipstick in Revlon Red 730, which is a vintage red, that suits any skin tone. This is also a great quality moisturising lipstick which has very dense pigment is also very long lasting.
10) Use blotting paper or loose fine powder: Finally, I have always kept blotting paper in my bag for the occasional touch-ups. My favourite is the little booklet of Lehacresor Papier Poudre which is now only available to buy online. Since I had run out of this, I took the Bourjois Java Rice Powder that I use occasionally as
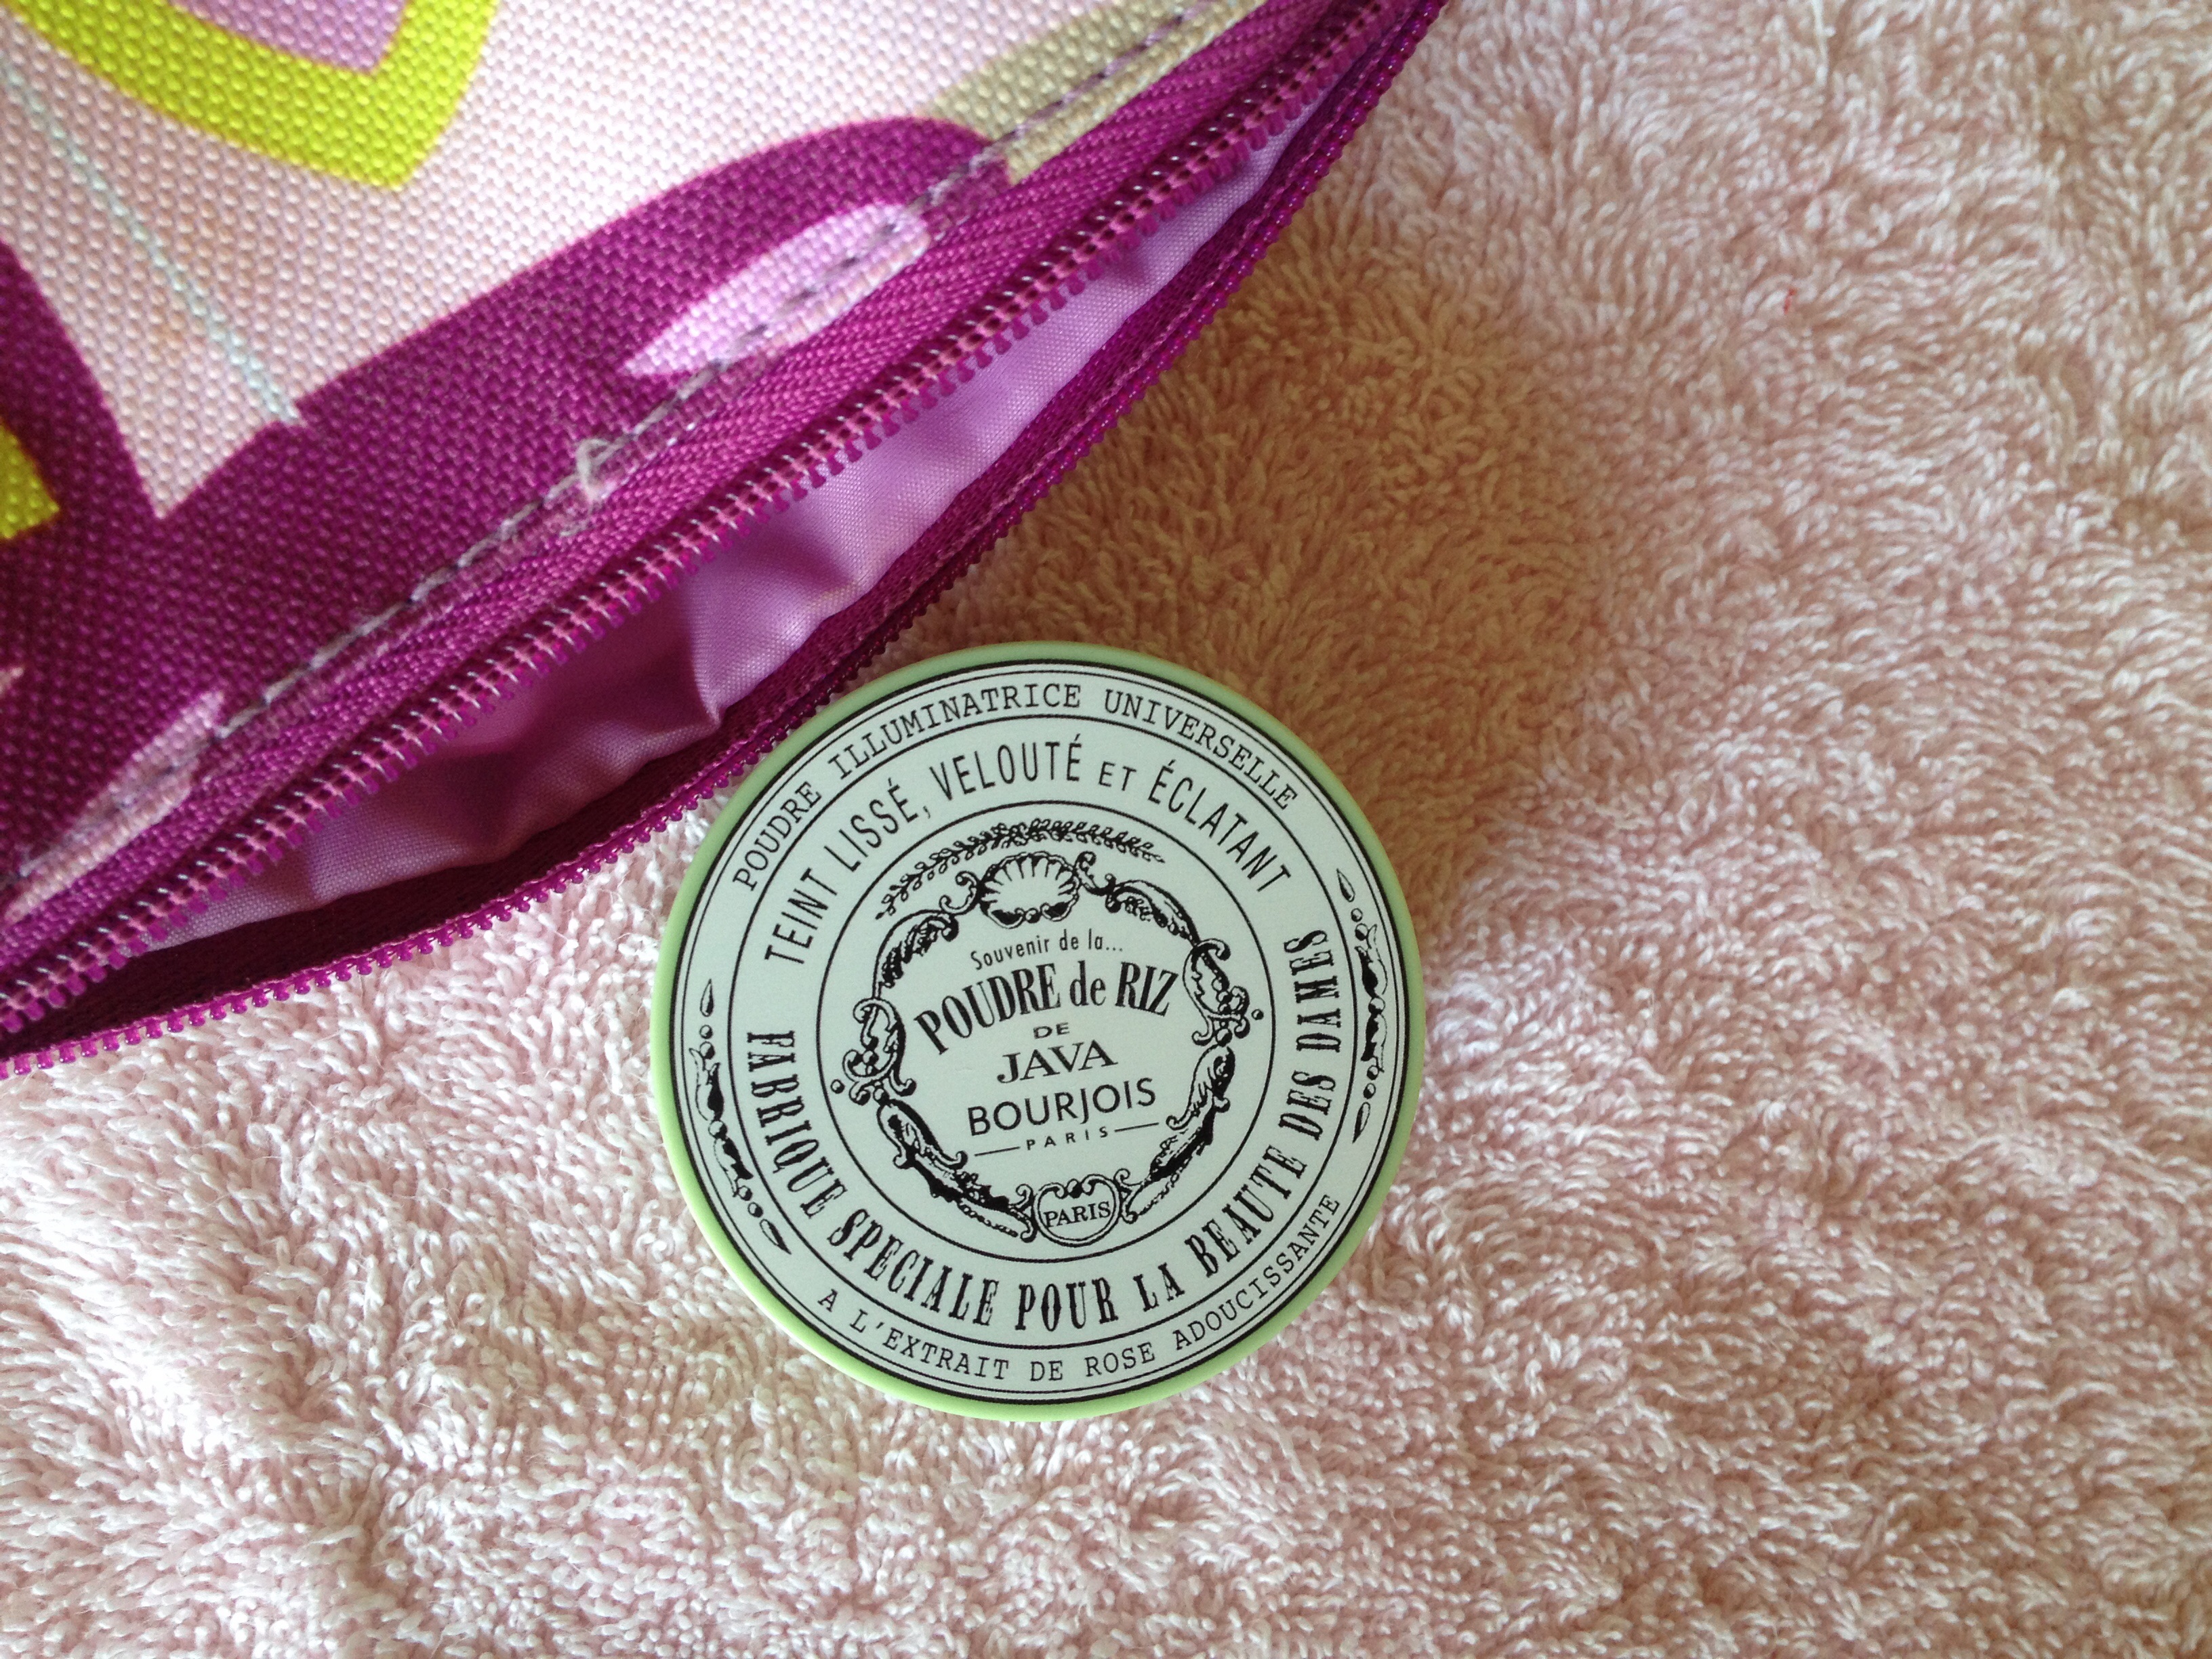
Bourjois Java Rice Powder
a subtle highligter for days when I think my skin needs help.
This powder looks like powdered mother of pearl. Although it is a soft delicate pale creamy pink, it is very fine and is translucent with a lovely light rosy fragrance which as you apply wafts around you, making the air feel soft and fragrant. I love the retro packaging.
By the time of the party, the office had literally melted in the heat, we had a power outage in the morning which meant most of the building had been without power and with it no air conditioning or fans to keep everyone cool.
I gave up on any idea of taking off the day-time makeup and re-applying fresh make-up for the party. Instead, I opted to dust the Bourjois powder over my face to revive my skin.
As the heat of the sun begun to fade, the open roof-top terrace was transformed into the maritime themed party, complete with a bar in the shape of a ship’s deck serving cocktails. The humidity and heat was forgotten as everyone turned up in fancy dress and partied on the lawn. I slipped away to get home early enough, just in time to unwrap a few of the birthday presents my kids had made for me before their bed-time.


")
")
")
")
")


")
")
")
")
")
")
")
")
")
")
")
")


")
")
")
")
")
")